Showing posts with label recipe. Show all posts

Tuesday, October 16, 2018

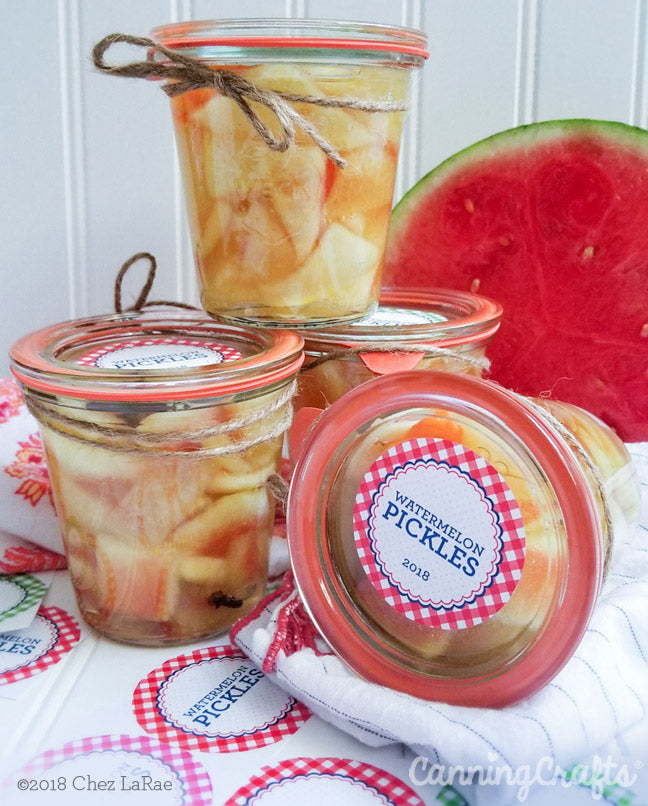
Watermelon Rind & Habanero Pickles Canning Recipe

Our friend and guest blogger Chez LaRae created this super awesome Watermelon Rind and Habanero Pickle recipe. LaRae is a cooking and baking instructor, recipe developer, self-taught baker, and editor at @thefeedfeed. Follow LaRae’s tasty food adventures on InstagramFacebook, and her website.
Watermelon Rind and Habanero Pickles Canning Recipe | CanningCrafts.com
While growing up in Minnesota, my aunt and uncle owned a rural country restaurant that served a gratis relish tray before the main course arrived. One unique item on the tray was watermelon pickles. The pickles were sweet, vinegary, and mildly spicy with hints of clove and cinnamon. The pickles had the consistency of a very ripe pear. I ate many watermelon pickles growing up, but only at their restaurant. Since then, I have searched for these pickles from my youth.

Today I wanted that familiar pickle, but with a contemporary twist. I omitted the cloves and cinnamon and instead added fresh habanero peppers. These pickles are wonderful served with a fruit and cheese platter or charcuterie board. They also pair well with grilled meats and roasts or straight from the jar. They are quite addictive!


Watermelon Rind and Habanero Pickles (Makes about 4 one-pint jars)

Adapted from an America's Test Kitchen recipe with permission © 2018 Chez LaRae

Ingredients:

  • ½ cup canning and pickling salt
  • 1 10-pound watermelon
  • 3 cups white vinegar, 5% acidity
  • 3 cups sugar
  • 1 cup water
  • 4 habanero peppers (Leaving the peppers whole in this recipe ensures that you have some heat, but not prohibitively so).

Directions:

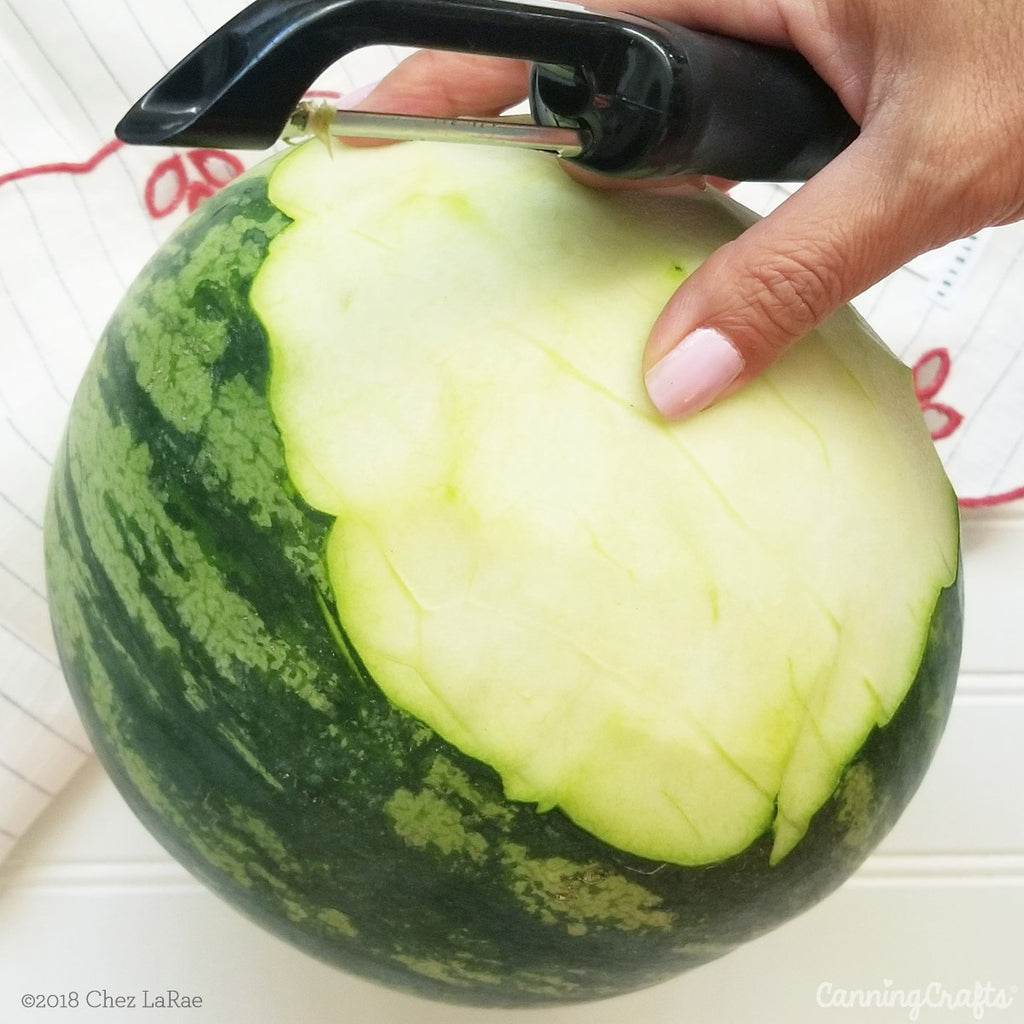
Using a vegetable peeler, peel entire watermelon. Using a sharp knife, quarter the peeled watermelon. Remove the rind from the flesh, scrape rind clean with a spoon, and cut rind into 1-inch pieces. It is okay to have a little pink on your rind as it adds beauty to the finished pickles. You will have about 10 cups of rind depending on the size of the watermelon. Reserve watermelon flesh for eating or other recipes.
Watermelon Rind and Habanero Pickles Canning Recipe | CanningCrafts.com

Dissolve canning salt in 2 quarts of water. Add rind and refrigerate for 4 hours. Drain and rinse rind. Bring two quarts water to a boil in a large Dutch oven over high heat. Add rind and cook until just tender. About 5 minutes. Drain.

Watermelon Rind and Habanero Pickles Canning Recipe | CanningCrafts.com

Meanwhile, set canning rack in water bath canner. Place four pint jars in rack and add enough water to cover the jars by 1 inch. Simmer over low heat until ready to use.

Bring vinegar, sugar, and one cup of water to a boil in now-empty Dutch oven over medium heat. Add rind and the four habanero peppers. Simmer until rind begins turning translucent, about five minutes.

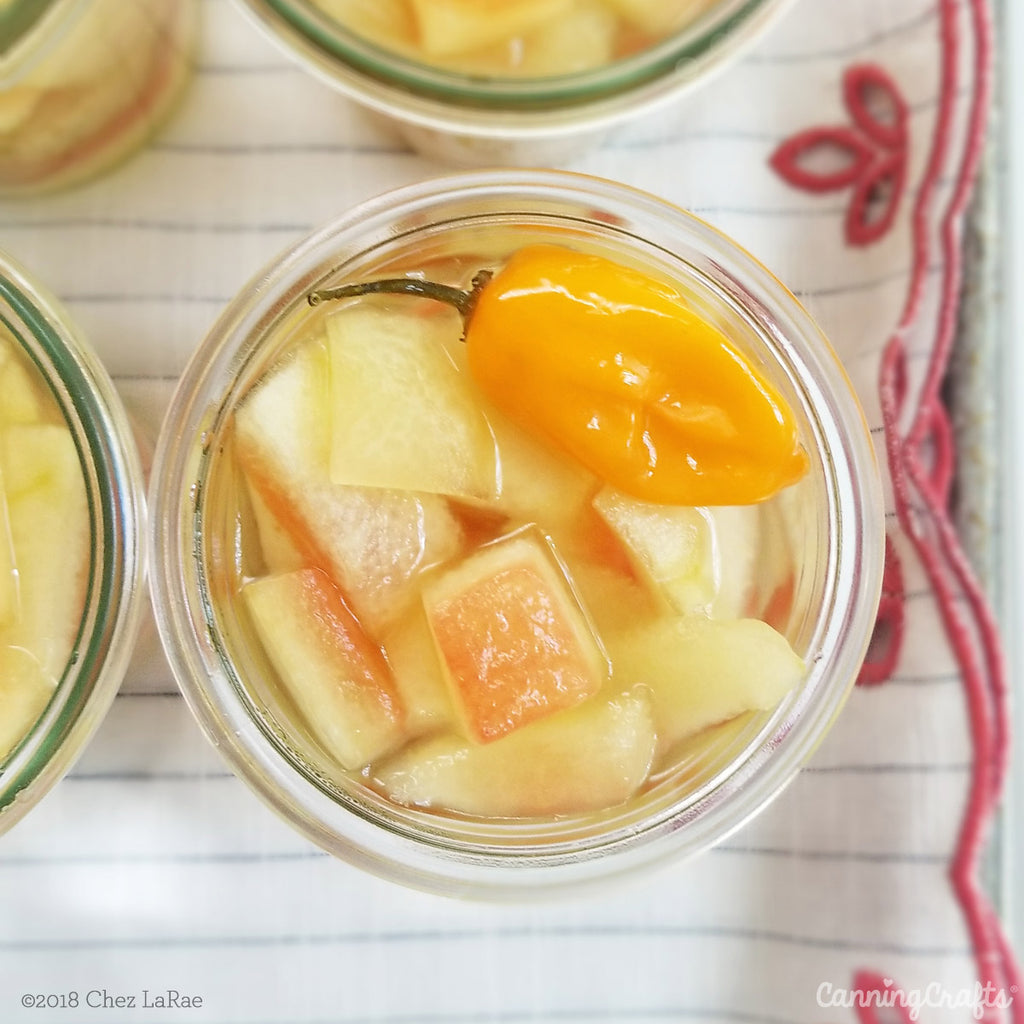
Using a slotted spoon or ladle, pack hot watermelon rinds into hot jars to within a generous 1/2″ headspace. Place one whole habanero in each jar. Ladle hot syrup into jars. Remove air bubbles with a skewer and readjust headspace ensuring 1/2″.  Wipe jar rims with damp cloth.
Watermelon Rind and Habanero Pickles Canning Recipe | CanningCrafts.com

Apply lids and bands and adjust until fingertip tight. Place jars in boiling water canner. When all jars are in the canner, adjust the water level in the canner so that it covers the jars by at least one inch. Cover the canner with a lid and bring water to a full rolling boil over high heat. Once the water is boiling hard and continuously, begin counting the processing time of 10 minutes.

Once full time is complete, turn off heat and let jars sit in canner an additional five minutes (this standing time allows the pressure inside the jars to stabilize and reduces the likelihood of liquid loss that could otherwise occur when the jars are removed.)

Remove jars and place on a kitchen towel-lined space. The towel will help reduce the chance of jar breakage. Do not dry the lids or jars at this point. You do not want to disturb the lids while the seals are being formed. Allow jars to cool for 24 hours before removing bands and wiping down jars. Label and date jars and store in a cool dry place for up to one year.
Watermelon Rind and Habanero Pickles Canning Recipe | CanningCrafts.com

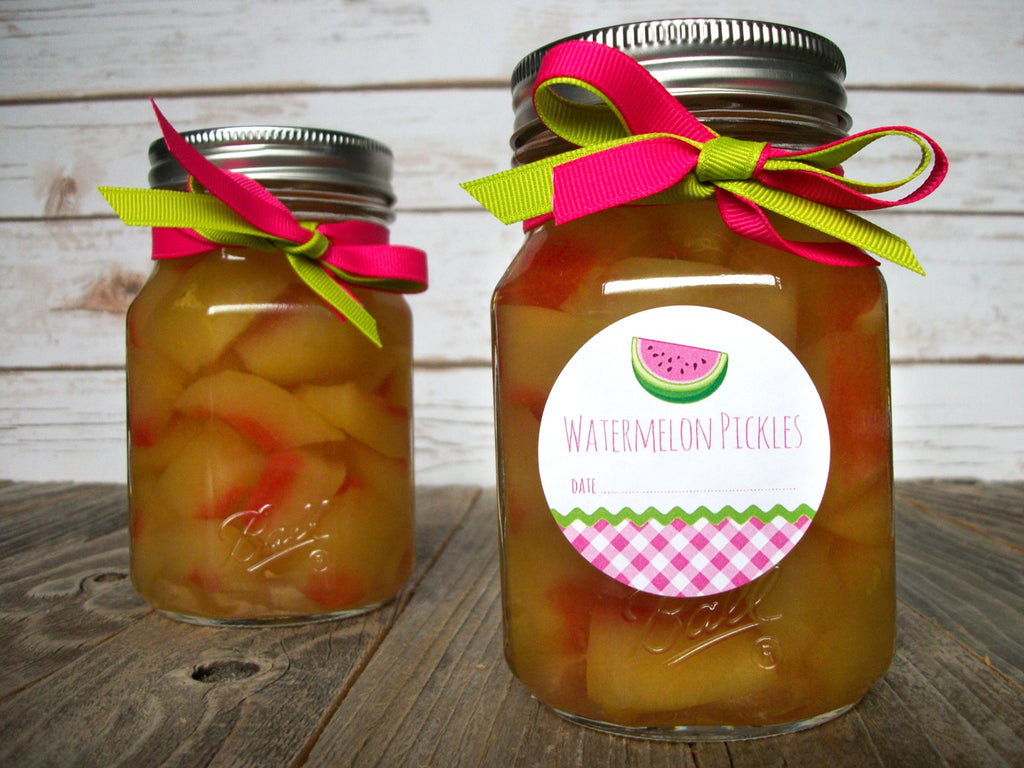
Dress up your mason jars with our Custom Farmer's Market Gingham canning labels. Labels are available in 9 colors and are printed with YOUR name, food text, and optional date.

Watermelon Rind and Habanero Pickles Canning Recipe | CanningCrafts.com


Our Gingham Watermelon canning labels are available for Watermelon Butter, Jam, Jelly, Pickles, & blank so you can handwrite your own text. See our Gingham Collection for other matching fruit & Veggie canning labels.

Watermelon Rind and Habanero Pickles Canning Recipe | CanningCrafts.com

Monday, April 30, 2018

Slow Cooker Chicken Bone Broth recipe & nutritional health benefits of bone broth

I am a huge (and at times annoying) proponent of bone broth. Annoying because my family can’t eat a bird of any size without me asking “Uhhh, whatcha’ gonna do with that carcass?” And at any given moment, our freezer looks like an aviary graveyard. “Oh, would you care for some ice-cream? Let me just move this chicken corpse out of the way.”
Crockpot Chicken Bone Broth Recipe & the healthy benefits of eating bone broth | CanningCrafts.com
But it is well worth the effort, in my opinion. Even with its extended cook time (24-48 hours), bone broth is super easy to make. Just set in the slow cooker and forget about it. But you won’t forget about it, because every time you pass by your kitchen it will smell like heaven. And while I’m mentioning cook times, I should address Bone Broth vs Stock. Stock is more or less made the same way, but with a much shorter cook time (usually 3-4 hours). While the final broth may seem the same at a glance, time makes a huge difference. The nutrient content is much higher in bone broth because of the extra long simmering time. This releases greater amounts of collagen and minerals from the bones, joints, and connective tissue. And that in turn becomes gelatin. Oooohh, jiggly jiggly gelatin :)

The Health Benefits of Bone Broth

Bone broth is truly a “super food”. You can call it "Liquid Gold" if you wish, I do! Bone broth is made from animal parts that are normally discarded: bones, marrow, cartilage, feet, etc. But it may be surprising to some to learn that those parts are loaded with nutritional value.  Marrow contains lots of minerals and dense amounts of protein. Cooking bones for longer periods of time (24-36 hours) will result in more minerals in the broth. There’s also a study showing that bone marrow fat helps with insulin sensitivity and breaking down fat. It’s also linked to a decreased risk of cardiovascular disease, diabetes, and obesity-associated cancers.
Cartilage contains glucosamine and chondroitin which are common supplements for arthritic pain. It breaks down to form collagen and gelatin which are also wonderfully healthy for you. Gelatin helps reduce joint pain and bone loss. It is chock full of amino acids such as proline, glycine, and glutamine. There’s a reason traditional Jewish chicken soup is called Jewish Penicillin! The amino acids reduce inflammation in the respiratory system, strengthen immunity, and combat the common cold. They help improve digestion and reduce inflammatory gut conditions like celiac’s and ulcers. Gelatin also helps with food sensitivities and allergies to certain foods like dairy milk and gluten. And let’s not forget about how it helps the outside of our bodies! Collagen reinforces nails, reduces wrinkles, makes your skin look amazing, and decreases cellulite.
A number of trace minerals such as sulfur, potassium, and sodium are also in bone broth. It may also be one of the best sources of calcium around. So that’s something to consider for dairy-free folks. But keep in mind, the longer cooking time of bone broth is what’s needed to bring these minerals out of the bones.
Slow Cooker Chicken Bone Broth Recipe & the healthy benefits of eating bone broth | CanningCrafts.com

To Slow Cook or Pressure Cook Bone Broth?

Some folks slow simmer bone broth over a low heat on their stove, but who wants to oversee that? Me, I chuck everything in my crock pot and slow cook overnight. But the question is: once I make my bone broth, do I need to use it while it is still fresh? How do I store it? Should I just freeze it? I can’t pressure cook it, right? Won’t that just destroy all the good stuff inside? 
Those last two points were the main questions I had. I assumed the intense heat from pressure cooking would neutralize the nutrients out of the broth. But as it turns out, that is up for debate. Some schools of thought say that because pressure cookers are cooking at a lower temperature than roasting, steaming, or boiling, the preservation of the nutrients is actually higher. Pressure cooking may retain up to 90% of the nutrients in some foods such as broccoli. Comparatively, boiling can result in up to 60% loss of nutrients. Yikes! The Nourished Kitchen doesn't recommend using pressure cookers for bone broth since they may denature proteins. Slow cookers cook food at a low heat level over longer periods of time. This helps preserve nutrients in bone broth. And to bring all the healthy goodies out of the bones, you need a longer cooking time.
I decided that if I was making and consuming bone broth for the health benefits, I would slow cook it and use fresh. Bone broth should be used within a week or frozen. I do freeze and reheat bone broth for soup too. But I only reheat bone broth on the stove since there's debate on whether microwaving bone broth alters the proteins and gelatin negatively. I know some people use a pressure cooker or Insta Pot for their bone broth. However, I'm not convinced that pressure cooking for a short amount of time brings out all the nutrients and gelatin. In my research, all reputable sources for bone broth recipes recommend a long cook time of 24-48 hours. It would be super handy to pull a jar of bone broth off the shelf though. As long as it's NOT OFF THE GROCERY STORE SHELF!! That's right, most boxed or canned bone broth at the grocery store is bone broth in name alone. They are processed at high heats with added preservatives to make them a shelf-stable product. Not to mention all the chemicals included in the packaging! A store-bought broth will pale in comparison to anything you make fresh too. Some stores may carry fresh or frozen bone broth though. Review the packaging ingredients and avoid MSG which is widely considered a neurotoxin. Also see if the bone broth was slow simmered which should be a sign of a quality broth.

Crockpot Chicken Bone Broth Recipe & the healthy benefits of eating bone broth | CanningCrafts.com

Tips for Making the BEST Bone Broth

There are a few easy steps to follow when preparing a good bone broth. Mind you, these aren’t make or breakers, but I think they help you get the most nutrient bang for your buck. Start with bones of grass-fed or organically raised animals. It only makes sense that using bones that were not raised with antibiotics or growth hormones would result in a healthier broth. This can be easier said than done! When you’re scrounging for bones from relatives, sometimes it’s a “take what you get” proposition.
Choose a variety of different bones for the best stock. Bones with a little meat left on them will add flavor while those with joints and connective tissues will yield more gelatin from the collagen. Marrow-filled bones lack meat and joints, but they contain lots of minerals and dense amounts of protein. So a few marrow bones are a good addition to bone broth. When I make chicken bone broth, I use the whole bird including the neck and wings. Adding a few feet will produce more gel as well.
Don't add too much water! Cover your bones with just a few inches of cold water. If you add too much water, you'll end up with a watery broth that won't have much gel. Adding the right amount of water will yield a rich-flavored broth with a nice gel. But alas, if your bone broth doesn't gel, it's still useable. It just might not be as chock full of nutrients.
The vinegar debate! Many people add a few tablespoons of apple cider vinegar (ACV) to the bones and water mixture. The ACV helps soften the bones and draws minerals and nutrients out. After cooking, your bones will start to become brittle and somewhat crumbly. Can you taste the vinegar in the broth? I personally cannot taste it. But then again, I put a whole head of garlic in my bone broth! Some people, however, don't add the vinegar at all and can't tell the difference in the final broth. Some think that adding a small amount of vinegar to the water wouldn't be enough to pull out a sufficient amount of minerals anyway. Another option is to break up the bones to draw out minerals before adding vinegar. Simmering bones in red wine before adding water is an alternative to using vinegar too.
Some people also re-use the same bones 2-4 times to make bone broth, before they turn into completely unusable mush. I tried this experiment ONCE and was not that impressed with the outcome. The second batch of broth wasn't gelatinous, so I doubt there were many nutrients and gelatin pulled out of the same bones. I added the same amount of vinegar with fresh veggies, herbs, and water to the second batch. Yet the second batch with reused bones wasn't as flavorful as round one either. It more or less tasted like veggie broth instead of chicken bone broth. So while it was still edible, I wasn't convinced it was the same "superfood."
What's the easiest way to prepare to make bone broth? I freeze cooked chicken bones and also use carcasses from cooked rotisserie chickens. You don't need meat for bone broth. Whatever small amounts of meat left on the bones is sufficient. Once I get a big bag of bones saved, I add all bones to a crock pot with veggies and herbs. You can also use raw bones, although roasting them will enhance the flavor. Roast raw bones for 45 minutes in a 425ºF oven. Then add to your crockpot and slow cook. I've also made a habit of freezing vegetable peels to add to broth too. And onion skins too. YES! Onion peels have lots of nutrients (more than the actual onion). They will give the stock a rich golden color too. Waste not, want not! 

Can You Use Other Bones Besides Chicken?

Yes, of course! You can use turkey, beef, fish, lamb, or other animal bones. Smaller animals like chicken require less time than larger bones to cook and pull out the nutrients. So a good 24 hours of cooking should be fine for chicken. Beef or lamb will most likely take a few days of slow simmering to pull all the good stuff out of the bones. Keep an eye on your water levels as you’re cooking. You can use raw bones, although roasting them will enhance the flavor. Roast raw bones for 45 minutes in a 425ºF oven before adding to your pot with water. 

Crockpot Chicken Bone Broth Recipe & the healthy benefits of eating bone broth | CanningCrafts.com

Crockpot Chicken Bone Broth Recipe & the healthy benefits of eating bone broth | CanningCrafts.com

Slow Cooker Chicken Bone Broth Recipe:

PRINT THE RECIPE CARD

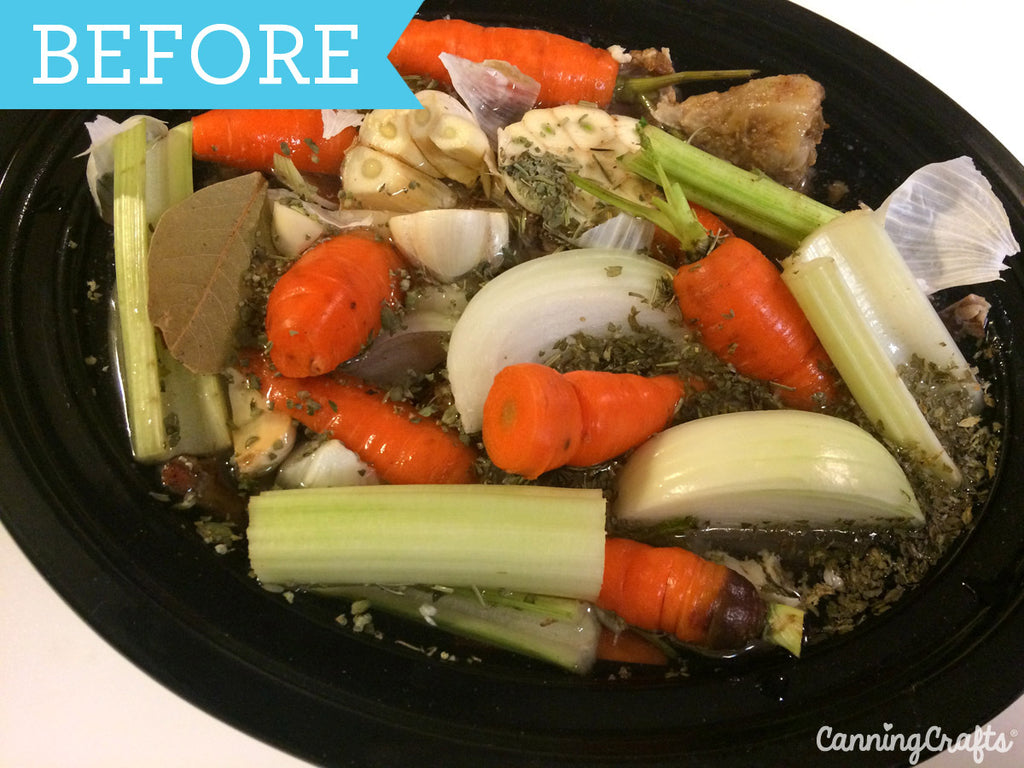
  • Bones, marrow, necks, wings, and cartilage from healthy, grass-fed chickens. Small bits of meat on the bone is ok, but otherwise you don't need meat. Fill almost to the top of crock pot, leaving enough room for vegetables.
  • 2-4 organic carrots, quartered. Peels and tops can be left on, just scrub well.
  • 2 stalks organic celery, roughly chopped. Leaves can be left on. 
  • 1 medium organic onion, cut into quarters. Leave the peels on and remove the roots. (TIP: Save extra onion skins for future broth making)
  • 1 head of organic garlic (or less to taste). Leave the peels ON and cut whole head in half.
  • 2 tablespoons apple cider vinegar. This is important because this is what draws out the gelatin from the bones.
  • Herbs: 1-2 teaspoons each of dried marjoram, rosemary, and parsley, plus one bay leaf. You can use fresh herbs too.
  • Cold filtered water to cover everything. It usually takes 8 cups to fill my 3.5 quart crock pot to the top.
  • Optional bonus: Add chicken feet. Whaaat? YES. Chicken feet are loaded with nutrients and are healthy for you.
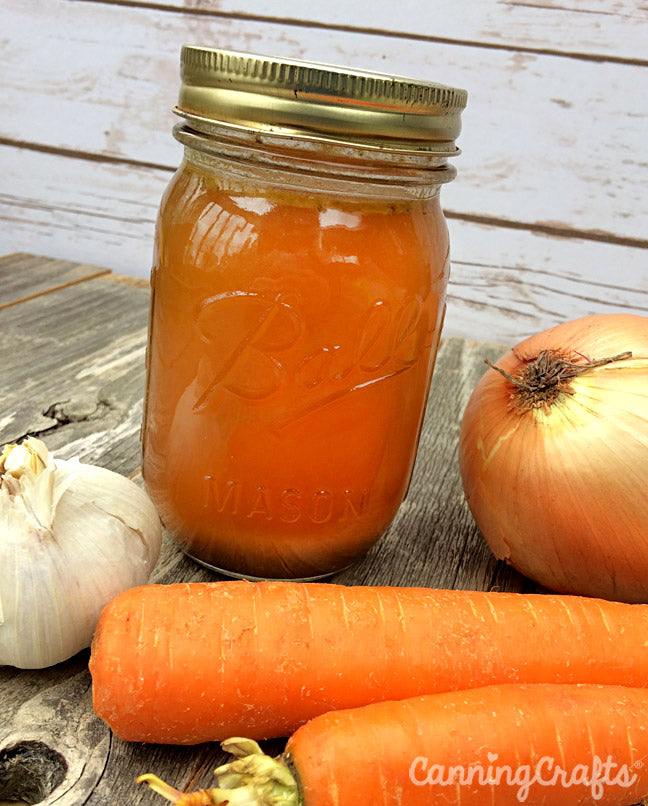
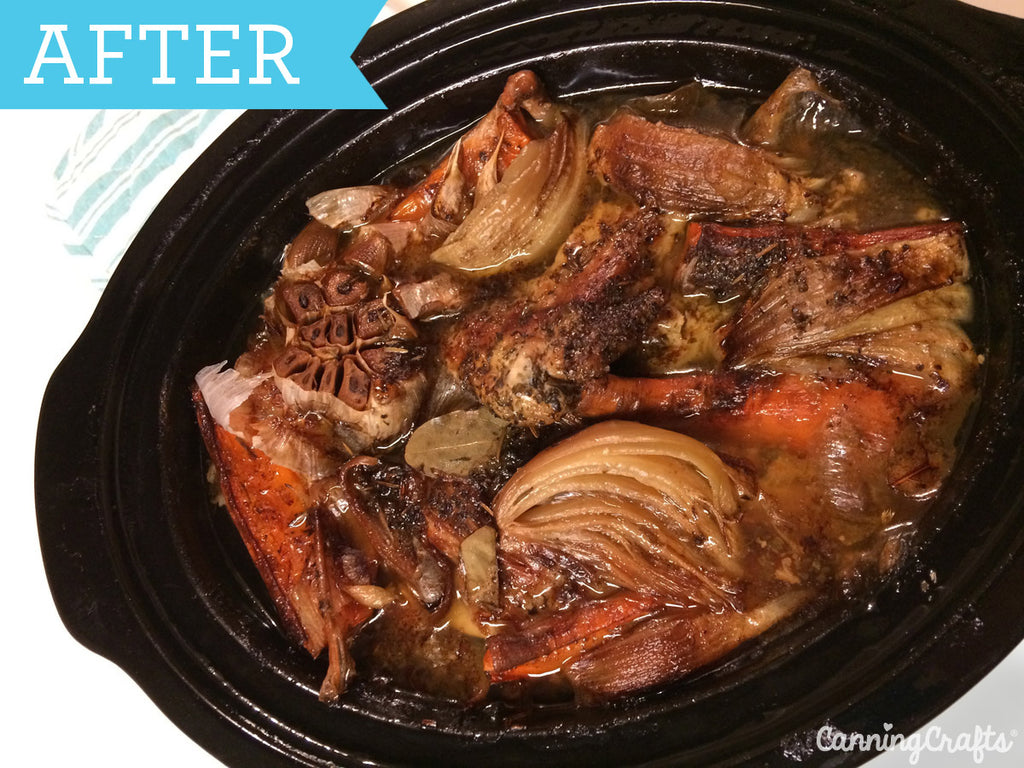
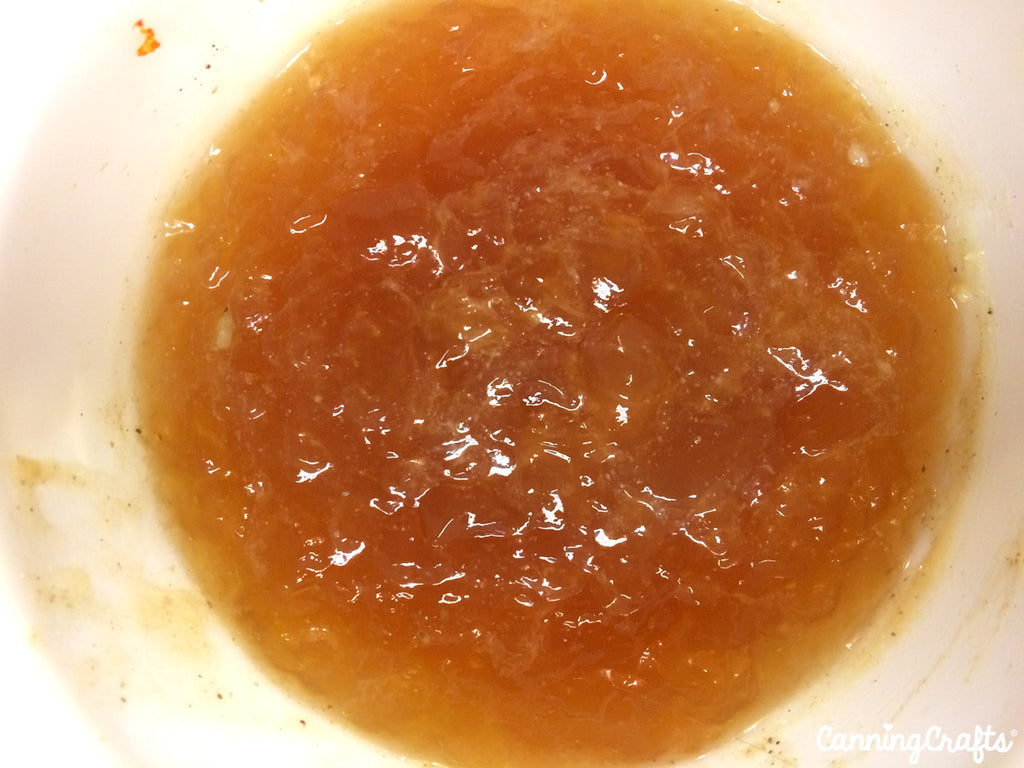
I cook in my crockpot on LOW, and let it go at least 24 hours overnight. You can cook longer too depending on how your crock pot cooks. Some folks cook their bone broth up to 48 hours. Let the finished broth cool down, then strain everything out with a slotted spoon. Or better yet, mash through a mesh strainer to get all the liquid gold out of the veggies and bones. I feel that any leftover meat bits are usually tasteless after cooking, so I gift-give to my very happy dog. Once cooled, the finished bone broth will be jiggly and gelatinous. My 3.5 quart crock pot yields about 2 quarts of finished bone broth. Man oh man, I wish I had a larger crock pot!
Crockpot Chicken Bone Broth Recipe & the healthy benefits of eating bone broth | CanningCrafts.com
The flavors and seasonings can be adjusted to your taste. I almost never have fresh herbs on hand, so I opt to use dried herbs instead. Rosemary and marjoram are my go-to herbs, but you may try thyme, oregano, or other herbs. If a whole head of garlic is too much for you to handle, you must be a vampire. But seriously, you can cut the garlic down to a handful of cloves for the recipe. Avoid brassica family veggies such as broccoli, cabbage, brussels sprouts, or greens as they will make broth bitter. I have successfully used swiss chard stems without the leaves in place of celery. Some root veggies such as potatoes, turnips, or beets may impact an earthy or sweet taste to broth. 

Chicken Bone Broth recipe card | CanningCrafts.com

How to Consume Bone Broth:

Some people drink bone broth in place of coffee for their morning routine. I AM NOT ONE OF THOSE PEOPLE. Give me coffee or get the heck out of my way. For optimal health benefits, drink 8 ounces of bone broth 1-2 times a day. Feel free to add a few seasonings such as salt or pepper for extra taste. Drinking bone broth every day will help with a plethora of health conditions. Have an ulcer? Drink a cup to help heal your gut. Starting to get a cold? Sip on this magic elixir. Allergies? This liquid gold is nothing to sneeze about. Give it a go! What do you have to lose? 
There are many recipes that bone broth is perfect for. I routinely use bone broth for soup. Add some celtic sea salt with fresh chopped veggies and it's a nourishing meal. It's hard to beat a classic chicken noodle soup when you're feeling sick. One of my favorite soup recipes is this Roasted Potato & Garlic Soup that I substitute bone broth into. I'll also freeze bone broth ice cubes to drop in sautés, roasted veggies, or cooked quinoa for added flavor. Bone broth may also be dehydrated to make broth powder.
You can also do a Bone Broth Fast by drinking several quarts of broth a day for 3-4 days or by doing Intermittent FastingThis is a good amount of time to help repair the GI tract and repopulate the gut with healthy probiotics. Limit eating much solid foods other than healthy fats, fruits, vegetables, and clean protein. Avoid all problematic and inflammatory foods such as processed foods, grains, FODMAPs, added sugar, dairy, refined vegetable oils, and complex carbohydrates during the fast. Those who may benefit the most from a bone broth fast include those with digestive disorders and symptoms, food allergies and sensitivities, fatigue, joint pain or arthritis, asthma, low immunity, or skin issues. Be sure to thoroughly read about fast precautions to determine if one is right for you. 
Slow Cooker Chicken Bone Broth Recipe & the healthy benefits of eating bone broth | CanningCrafts.com
Our Farm Fresh Rooster canning label is a great match for bone broth!

Additional Reading:

The Weston A. Price Foundation is a great resource on all nutrition and health issues with actual scientific validation. They cover the history of bone broth and the importance of consuming natural gelatin over those synthesized by food companies. If you're into super sciency reading with actual medical references and whatnot, they wrote extensively about The Essential Roles for Proline, Glycine and Gelatin in Bone Broth. It's a lengthy read for sure! 
There are many websites with a plethora of information on Bone Broth. Dr. Axe thoroughly covers the healing properties of bone broth with references to clinical studies. He also provides detailed info on bone broth fasting
Delishably has a great article about eating chicken feet. Don't be grossed out about the thought of eating chicken feet since they resemble hands! Chicken feet are filled with healthy collagen, hyaluronic acid, and chondroitin sulfate. These will benefit your skin complexion, arthritis and inflammation, and heart health. And a lot can be said about not wasting any part of an animal.
Mark's Daily Apple is a great overall resource for health and wellness. Mark Sisson has written many articles about bone broth nutrition and benefits.
The Nourished Kitchen has many great articles and even recipes for bone broth. They also have a recipe technique called Perpetual Bone Broth which makes gallons per week.
Slow Cooker Chicken Bone Broth Recipe & the healthy benefits of eating bone broth | CanningCrafts.com

Have you made bone broth before? Do you have any special recipes, tips or tricks? We'd love to hear from you in the comments below.


Monday, March 26, 2018

Orange Peel Cleaner Recipe & other uses for citrus peels in your home & garden

You make some lemonade; you toss the lemon peels. You eat an orange; you toss the peels in the compost. You add some lime to the coconut; the peel gets pitched. It’s a shame that up to 40% of fruit is wasted. But it doesn’t have to be! There are a ton of uses for your citrus peelings.
How to Make a DIY Citrus Vinegar Cleaner with Orange Peels | CanningCrafts.com

DIY Citrus Vinegar Cleaner

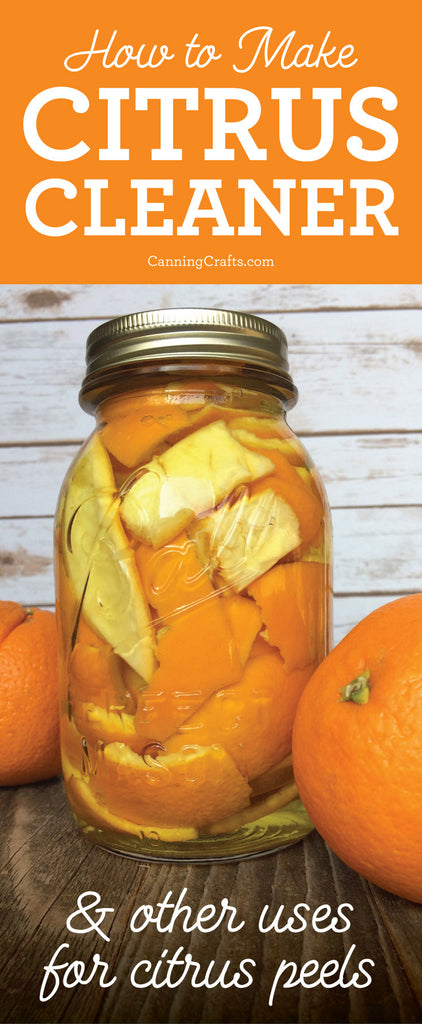
One of my personal favorites is using the grease smashing properties of citrus and combining it with the might of vinegar. Together they are a disinfecting powerhouse that is nearly unstoppable. And making it is crazy easy. Just fill a mason jar with your collected citrus peels. I use orange peels, but you can also add lemon peels. Once filled to capacity, pour in white vinegar to the top of the jar. Then put the lid on and let sit for a minimum of 2 weeks. Strain out the peels and combine the vinegar with water at a 50/50 ratio. If you want to get extra fancy, add some dried herbs to your spray bottle for an olfactory delight. Your kitchen and bathroom counters won’t know what hit ‘em! Please note, citrus may damage some surfaces. Do not use on granite, marble, stone or hardwood floors, or painted surfaces.
How to Make a DIY Citrus Vinegar Cleaner Spray with Orange Peels | CanningCrafts.com
Our orange canning jar labels and pastel dots labels are nice options for labelling your concoctions!  

Citrus Deodorizers and Potpourris

Orange and lemon peels also make tremendous deodorizers. They have the natural ability of absorbing foul odors. Place some peels in the back of your fridge or in the base of your kitchen garbage can to keep things smelling fresh. Shred peels in your garbage disposal to release that great citrus smell in your kitchen. Make a refreshing potpourri by simmering peels in water with some cinnamon and cloves. Add cut up peels to stockings and hang in closest or cars. Your nose will thank you, especially when you replace synthetic fragrances with FREE and natural scents.

Lemon Peel Cleaners

Lemons are especially handy for removing hard water stains on faucets. Rub fresh lemon peels onto stainless steel faucets to remove unsightly white buildup. Repeat as needed and your faucets will shine bright! This will also work on copper, silverware, pots and pans.
Are you a coffee or tea junky who is also bad at cleaning stained mugs and pots? Lemon to the rescue! Add some salt to the outside of a lemon peel to rub away stains on mugs. Coffee tastes better from a clean pot, so don’t forget to clean that too. Add lemon peels and water to your pot, then turn on. As the pot heats, citric acid is released from the peels and melts the stains away. Coffee anyone?

Citrus Vinegar Pest & Cat Repellant

Another great household use for peels is as a pest deterrent. Citrus has an acidic oil in its peels called d-limonene. This substance is toxic to ants and will kill them if they come in contact with it. You can make a citrus-vinegar mixture similar to the cleaning formula above. Put some peels in a pot and cover with white vinegar. Heat the pot to almost boiling, then turn the heat off and let it sit for 2-12 hours. The longer you let it sit, the stronger the concentration. Strain the liquid into a spray bottle and have at those ant intruders!
You can also add citrus peels to flower beds and gardens to repel cats. I personally tried this with no luck. If you have tried everything else to repel cats, it's worth a try. Just cut orange peels up into one inch pieces. Scatter in your flower beds or anywhere you don't want cats. Add new peels once a week to refresh. No need to remove the old peels outside since they'll decompose. 
Another option is to make a citrus repellant spray for cats. Bring 2 cups of water and 1 cup of chopped citrus peels (orange, lemon, or limes) to a boil. Reduce heat and simmer 20 minutes. Remove from heat and let cool, then strain the peels out and add to a spray bottle. If anyone has luck with any non-lethal cat repellant, I would LOVE to hear about it!! This solution is also supposed to work for dogs, but why on earth would you want to repel them? ;)

Add Citrus Peels to Food

Candied citrus peels are definitely the place to start. So delicious, once you make them you will accept no substitutes. This Candied Citrus Peel recipe would be great on baked goods or ice cream. And just imagine them dipped in dark chocolate. Mmmmmmm.
This citrus infused vinegar recipe is great for salads or cocktails. If you want a vinegar with a knockout color, try this Blood Orange Balsamic Vinegar recipe.
Stop buying expensive store-bought extracts! They are so easy and cost-effective to make yourself. In no time you can whip up some lemon or orange extract in your kitchen. Citrus extracts are perfect for holiday gifts or favors once packaged up in cute bottles or mason jars.
Make citrus ice cubes by infusing water with leftover peels. Add peels to a pot of hot water and steep until infused. Freeze orange, lemon, and limes cubes, or combine all flavors together. Lemon ice cubes are especially tasty in ice tea.
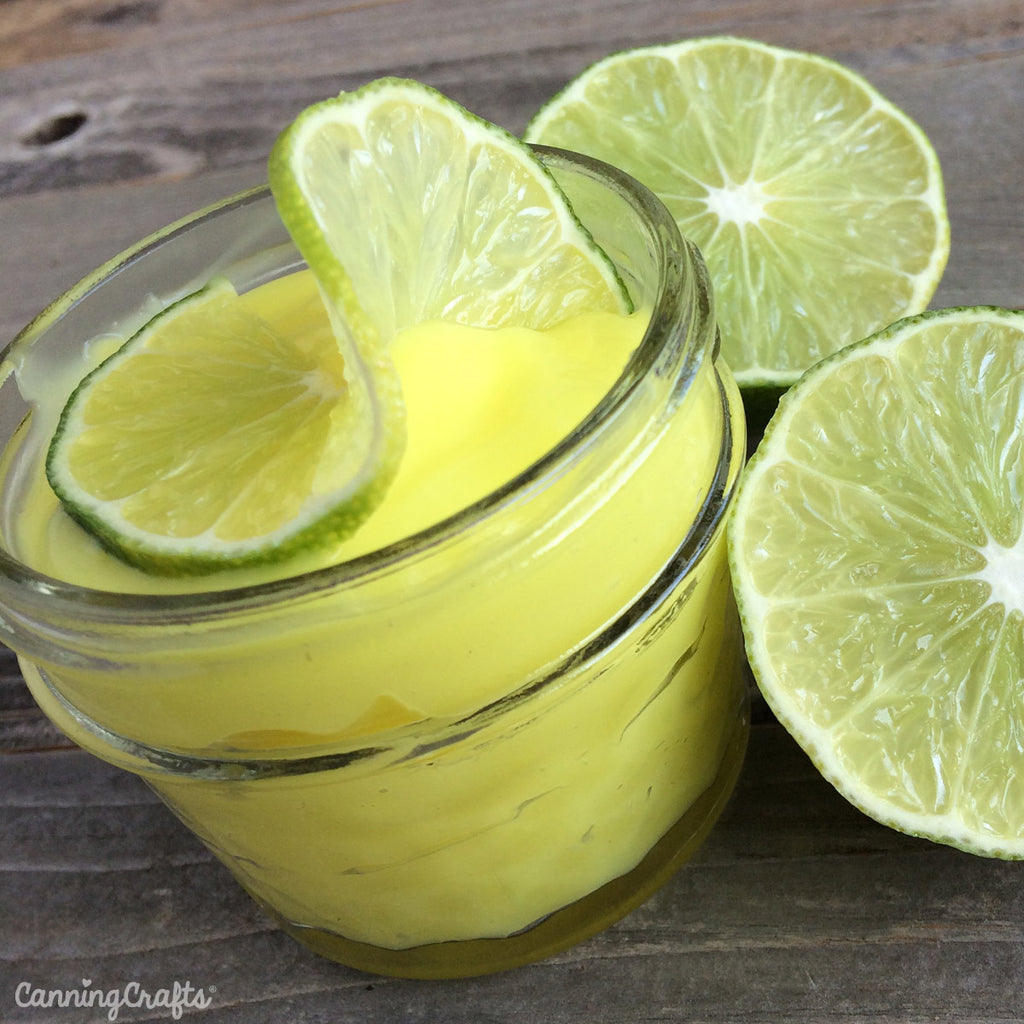
You can also use citrus zests in food like our Zesty Lime Curd recipe. Spread this delicious curd in a baked tart shell for a quick dessert. Top the tart with a ring of fresh raspberries or a twisted lime slice to impress.
Lime Curd Recipe | CanningCrafts.com
One of the easiest ways to enjoy your citrus peels is to dehydrate them and add them… to everything! Trail mix, oatmeal, cupcakes, pancakes, smoothies, salads, ice cream, chicken or fish… okay, you get it. Preparing your dehydrated peels is easy. Just slice them into bite-sized pieces and leave them out to dry. Easy-peasy! Or, if you want to speed the process up, place peels on a cookie sheet in a 200° oven and let them bake for a couple hours. You’ll know they are done when the edges start to curl up. And I guess I should mention, you want to use organic oranges if you are going to consume the peels. Don’t forget to wash them, too!
Grind Dried Citrus Peels in Spice Grinder | CanningCrafts.com
I run dried citrus peels through my spice grinder to make a wonderful powder. The citrus powder is perfect for adding to dressings, marinades, smoothies, or baked goods. Store the citrus powder in a recycled spice jar and shake away!
Grind Dried Citrus Peels in Spice Grinder to Make Orange Powder | CanningCrafts.com

Health & Beauty Benefits of Citrus Peels

Another fantastic use for dried peels is to make your own… wait for it… homemade Vitamin C powder! YASSSS!!! Citrus is high in Vitamin C, but the nutrients are concentrated in the peels. In fact, the peels have nearly twice the Vitamin C as the flesh. Put dehydrated peels in a spice grinder and you have fresh Vitamin C powder. This is better than anything you can buy at a store. That’s because your homemade version will contain live enzymes that the pharmacy varieties lack. Use as a natural supplement by adding to water, smoothies, or foods.
 
And that leads me to the other health benefits of citrus peels. Orange peels are nutrient rich and healthier than the flesh of the fruit. The peel is loaded with flavonoids, which are antioxidant compounds known for assisting in the prevention of chronic health conditions. The flavonoid hesperidin has been shown to benefit those suffering with heart disease. It significantly lowers diastolic blood pressure. And polymethoxylated flavones have been shown to lower cholesterol just as well as prescription drugs, without any possible side effectsThose polymethoxylated flavones are also suspected to be protective against the occurrence of cancers, though research is still in the early stages.

Lemon peels are fantastic for skin care. The citric acid in them is a bleaching agent, therefore, they act as a natural skin lightener. They may also enhance the softness and clarity of your skin by removing dead skin cells and stimulating new skin growth. To help with acne, wash and grate the skin of 5-8 lemons and add their juice into a bowl. Mix together, store in a bottle, and shake before using. Apply the mixture to your skin and massage in a circular motion once a day. Leave the solution on for about 5 minutes. You'll feel the tingle as it seeps into your pores. Rinse and dry your face.

Citrus Peels Crafts & Jewelry

Dried citrus peels look gorgeous formed into roses. It does take patience and a steady hand. Use a knife to strip the peel off in one long piece. Then roll the peel up into a rosette and pin in place with a toothpick until dried. The final citrus flowers are great in potpourri, decorations, or used in jewelry. Get extra crafty and make an orange peel bead necklace.

orange peel roses | CanningCrafts.com
How to make orange peel roses for jewelry or potpourri | CanningCrafts.com
DIY Citrus Vinegar Cleaner Spray using orange citrus peels | CanningCrafts.com

We LOVE preventing food waste! What ways have you repurposed leftover citrus peels? Let us know in the comments below.


Sunday, February 25, 2018

Healthy Vegan Chocolate Peanut Butter Banana Granola Recipe

mmmmm, Chocolate Peanut Butter Banana Granola! Elvis personally told me this recipe was awesome the other day when we spoke. Thank you very much! And why wouldn't he love it? It has 2 of his favorite ingredients... peanut butter and banana. Except this recipe is a healthier version than his fried sammies. But delicious nonetheless. 
In an effort to reduce my husband's sugar intake, I set out to cut his beloved store-bought granola. Many granolas are loaded with added processed sugars. Store-bought granola is also expensive considering how small some of those boxes are. I wanted to make granola with healthier ingredients and less sugar. I'll breakdown the ingredients and acceptable substitutes below. NOTE: If you want a super sweet granola, this recipe is NOT it. But you can adjust it to your own taste buds!
Chocolate Peanut Butter Banana Granola Recipe | CanningCrafts.com

Oats

Oats, the main ingredient in most granola recipes, are one of the healthiest grains around. They are nutritious and loaded with vitamins, minerals, and antioxidants. This makes them one of the most nutrient-dense foods. The antioxidants may help lower blood pressure and reduce inflammation. Their soluble fiber helps reduce cholesterol and blood sugar levels, and promotes healthy gut bacteria. Oats are also effective at lowering the total and LDL cholesterol levels.

Natural Organic Peanut Butter

Most store-bought peanut butter is terrible and not good for you. But that doesn't mean peanuts can't be healthy! Peanuts are one of the highest plant-based forms of protein. They support and boosts metabolism and fat loss. But you need to consume a natural, organic peanut butter that is healthy. I make my own peanut butter. What's in it? Unsalted, roasted peanuts. Yep, that's it. ONE ingredient. No added sugar, salt, or hydrogenates oils. I grind the peanuts in a vintage Champion Juicer, but you can also use a food processor. The finished peanut butter needs stored in the fridge since it lacks preservatives. This homemade peanut butter is soft without runny oil. Once stored in the fridge, it firms up some over time.  Almond butter or cashew butter would work great as a substitute.

Nuts (Walnuts, Almonds, & Pecans)

I add a mix of nuts to my granola. Walnuts, pecans, and almonds share some of the same health benefits. Walnuts are a superstar of the nut world. They improve brain and heart health since they have high amounts of omega-3 fats. Walnuts are an anti-inflammatory food that help prevent cancer. Added bonus, they are great for weight management! Walnuts are full of fatty acids and some protein which help make you feel full, as are almonds. Two key nutrients in almonds, riboflavin and L-carnitine, help prevent cognitive decline. This makes them great for reducing the risk of dementia and Alzheimer’s disease. Pecans are also known to help reduce obesity due to their manganese, copper, and thiamine. Tree nuts can reduce blood pressure and decrease overall cardiac-related deaths. Nuts are one of the top cholesterol-lowering foods.

Chocolate Powder (or cocoa powder)

I use Garden of Life Raw Organic Perfect Food Green Super Food Juiced Greens Powder: Chocolate Cacao flavor. Wowzers, what a long name! This powder has greens, sprouts, fruits, vegetables, live probiotics and enzymes. Some of the healthy greens are broccoli, barley and wheat grass juice, and spinach. Organic sprouts include flax, amaranth, quinoa, chia, and millet. It's organic, raw whole food, NON-GMO, gluten, soy, and dairy free. There are NO added sugars or artificial sweeteners. I add this powder to smoothies, granola, and protein bars. You can substitute cocoa powder instead of a green powder. The carob and cocoa in this powder are subtle and not overpowering. So if you want something super chocolatey, add more of this mix or use cocoa powder instead.

Unsweetened Banana Chips

Bananas are full of important nutrients and a great source of nutrition for most people. Since bananas are high in sugar, I only use unsweetened banana chips without any added sugar. Store-bought banana chips often have added hydrogenated oils, so dehydrate your own or check ingredients. Carbohydrates in bananas boost energy levels and help to build strength and muscle. This makes them a great pre- or post-workout snack. Bananas are loaded with potassium which helps to heal and build muscle. Potassium also promotes circulatory health and helps to lower high blood pressure. The fiber in bananas helps improve digestive health, makes you feel full longer, and helps reduce inflammation.

Unrefined Extra Virgin Coconut Oil

Coconut oil is a healthy fat that is great for baked goods in place of unhealthy vegetable oils. If you're confused by conflicting reports on whether coconut oil is healthy or not, read this detailed article. Unrefined coconut oil is minimally processed, so it retains the coconut flavor and smell. Olive oil can be substituted for coconut oil using the same ratio. AVOID unhealthy corn or soy oil! These oils are mostly genetically modified and increase risks for heart disease and breast cancer.

Unsweetened Coconut Chips

I prefer to use unsweetened coconut chips (or flakes) in my granola because I like the bulk and crunch. Shredded coconut would also work. Sweetened coconut usually has corn syrup and other additives, so I avoid it. Since unsweetened coconut is drier, I mix it in with the liquids and let it sit a minute before adding the oats. I've found this helps them from getting too toasty when baking.

PURE Maple Syrup

Not artificial syrup! Why not? Have you tasted REAL maple syrup? It's amazing! PLUS, it isn't made with high fructose corn syrup and artificial ingredients. A great benefit of maple syrup is that it has a less adverse effect on blood sugar levels than processed sugar. It also contains several trace minerals. Zinc fights illness and improves immunity. Manganese helps with fat and carbohydrate metabolism and blood sugar regulation. Maple syrup contains higher levels of antioxidants. This makes it better for digestion than refined sugar products. Raw honey is a great substitute for maple syrup. Sometimes I use half maple syrup and half honey in my granola, or all honey. As with any sweetener, maple syrup is best used in moderation. This recipe calls for less overall sweeteners than most granola recipes.

Flaxseed Meal

The health benefits of flax are amazing. Flax is a great source of Omega-3, protein, and fiber. It increases nutrient absorption, lowers cholesterol, and helps reduce sugar cravings. These are all wonderful things that I knew my husband could benefit from. BUT, he hates flax. I've discovered it's one of those ingredients that is very easy to hide in recipes once it's ground up. And my husband doesn't read my blog, so he'll never know. Shhhhh. Flax can be eliminated from the recipe. It's not something I can personally taste, and it doesn't impact the final outcome of the granola.

Pepitas

First things first, are pepitas the same thing as pumpkin seeds? Technically, yes. But pepitas don't have a shell and are only found in certain pumpkin varieties. These crunchy green gems contain plenty of protein which is great for muscles. Their fiber supports a healthy digestive system. High in plant-based omega-3 and antioxidants, they can help lower inflammation and balance your diet. Pepitas are also packed with minerals! Phosphorus supports bone health, and zinc supports immune system health. Sunflower seeds would be an excellent substitution or addition to this granola.

Chocolate Peanut Butter Banana Granola Recipe | CanningCrafts.com

Chocolate Peanut Butter Banana Granola Recipe (makes approx. 1 gallon) print the recipe card

  • 1/3 cup natural peanut butter (no added sugar or salt if possible)
  • 1/3 cup pure maple syrup
  • 1/4 cup unrefined virgin coconut oil
  • 2 tablespoons chocolate protein powder (or cocoa powder)
  • 1/8 cup ground flax seed meal
  • 1/3 cup raw pepitas
  • 1/2 cup unsweetened coconut chips
  • 1 cup coarsely chopped nuts (pecans, almonds, walnuts)
  • 6 cups rolled oats
  • 3/4 cup unsweetened banana chips
  1. Pre-heat oven to 340 degrees.
  2. Heat peanut butter, maple syrup, coconut oil, and chocolate powder (or cocoa) in a small pot over low heat until combined.
  3. Add liquid mixture to large bowl with coconut chips, pepitas, flax meal, and chopped nuts. Do NOT add banana chips yet! Stir to combine.
  4. Add oats and mix thoroughly.
  5. Spread mixture onto large cookie sheet. Press granola down with a spatula.
  6. Bake at 340 degrees for 15 minutes. Gently stir granola, and bake for an additional 15 minutes.
  7. Cool on cookie sheet. Stir in dried banana chips. Store granola in a gallon mason jar.
The first time I made this granola, my husband didn't think it was sweet enough. He had just come off his store-bought granola sugar high after all. Many granola recipes call for added white or brown sugar or corn syrup, but this recipe only had maple syrup. So I added a few tablespoons of sugar to the second batch of granola that I made. Gradually, I reduced the sugar with each batch until there was no added sugar. And the last time my husband ate store-bought granola, he thought it was way too sweet. So my evil genius plan to reduce his sugar intake worked. Mwahahaha.
I make several granola varieties including an apple spice and pumpkin granola. It's easy to swap out ingredients and come up with new flavors to try. Use honey instead of maple syrup or applesauce instead of pumpkin puree. The main thing I've learned is to keep the ratio of wet ingredients to dry ingredients about the same. Have fun coming up with your own version of this granola.
Chocolate Peanut Butter Banana Granola Recipe | CanningCrafts.com

PRINT THE RECIPE CARD

Chocolate Peanut Butter Banana Granola Recipe | CanningCrafts.com
 Chocolate Peanut Butter Banana Granola Recipe | CanningCrafts.com
Chocolate Peanut Butter Banana Granola Recipe | CanningCrafts.com

Do you make your own granola? If so, what combinations of fruits, nuts, and sweeteners have you used? Let us know in the comments below.