Showing posts with label garden. Show all posts

Tuesday, June 6, 2023

Trench planting tomatoes for Epic Root Growth & Strong Plants

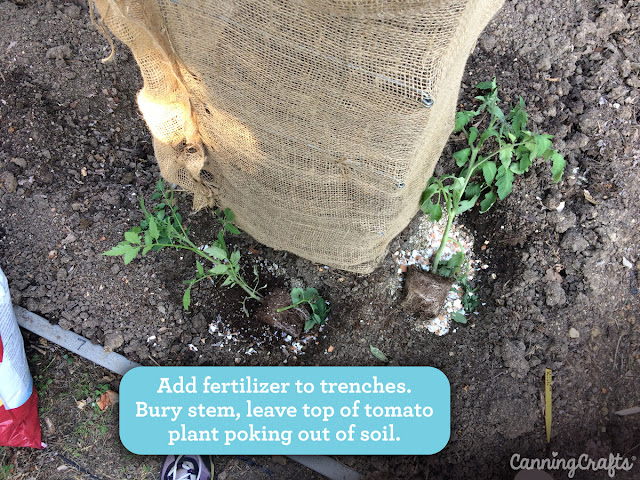
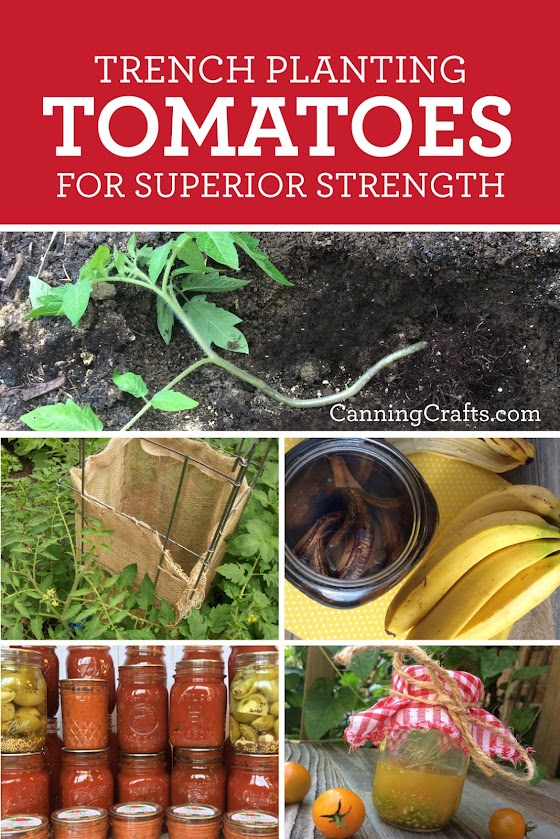
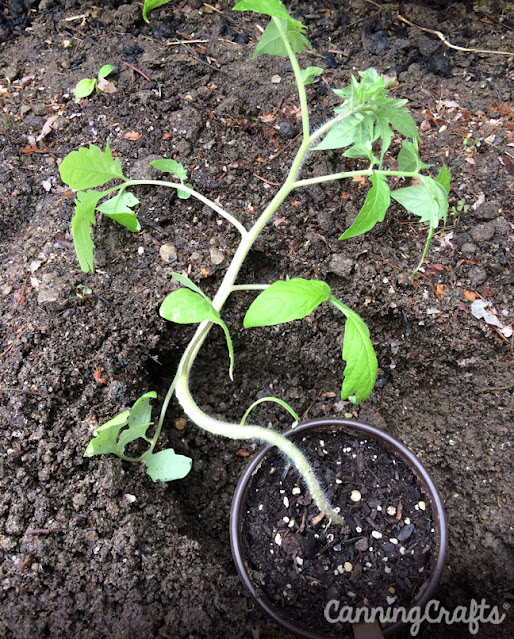
Oh, what to do with with the too tall & spindly tomato plants that you've put off getting into the ground? Are they a lost cause? Need to head back to the garden-center and get some fresh "perfect" ones? Au contraire. Check out our Trench Planting Tomatoes blog-post, and find out how you can not just salvage your maladroit seedlings but make them truly flourish.

Get the Trench Planting Tomatoes guide and tutorial on CanningCrafts.com.

Trench Planting Tomatoes

Trench Planting Tomatoes

Trench Planting Tomatoes

Trench Planting Tomatoes

Need canning recipes? We got 'em! Go to our website CanningCrafts.com for jam, jelly, chutney, & veggie recipes, oh my!

Monday, April 10, 2023

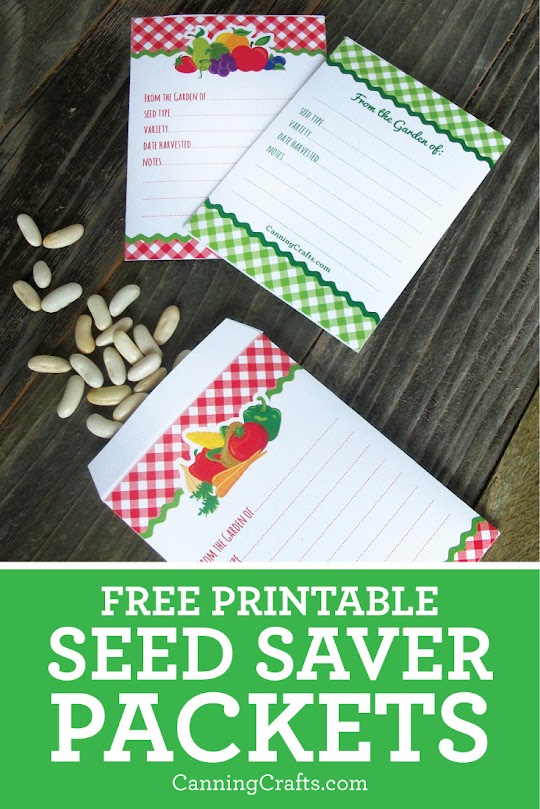
Free Printable Seed Saver Packets for collecting and storing fruit & vegetable seeds

Seed collecting and storage is a tradition going back to the very beginnings of humanity. Of course you would save the seed of a particularly fruitful or extraordinarily delicious plant so that you could replicate that success again the next season. It's not so much a lost art, but it is definitely an art that is not utilized nearly enough. Our printable seed saver packets will hopefully assist you in recapturing that piece of our past. Because being more self-reliant and food secure is a human trait that never goes out of fashion!

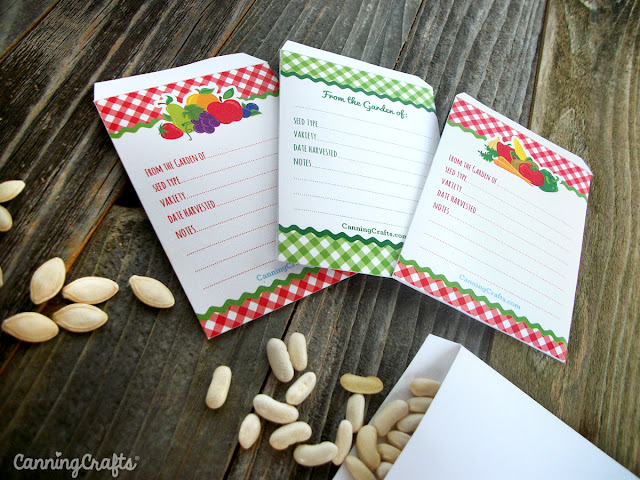
Get the FREE printable Seed Saver packet files on CanningCrafts.com.

printable seed saver packs

printable seed saver packs

printable seed saver packs

Need canning recipes? We got 'em! Go to our website CanningCrafts.com for jam, jelly, chutney, & veggie recipes, oh my!

Canning Recipes

printable seed saver packets

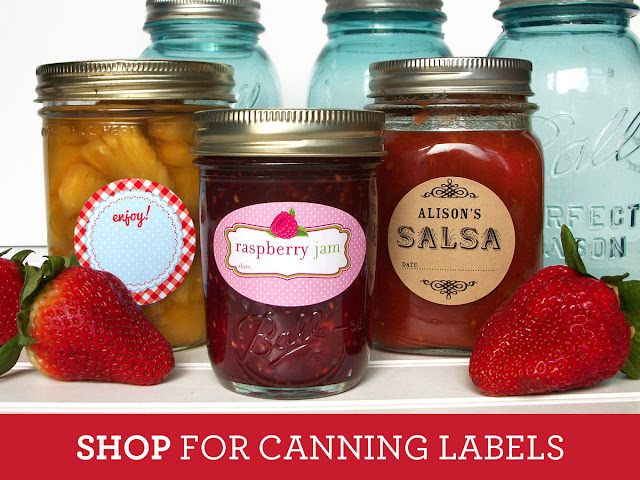
Shop for Canning Labels on CanningCrafts.com

Wednesday, March 1, 2023

Dandelion Recipes... or How I Stopped Worrying & Started Eating My Lawn

Here's a cost saving tip that is two-fold, in an era where everyone's pocketbook is taking a beating. Step 1: Stop paying companies to plaster your lawn with chemicals to kill all the weeds and crabgrass. I know, it's a mighty tough one to give up, but your local songbird and insect populations will like you much better. Step 2: Now that your lawn is au naturale, you can start partaking in the delicacy that is dandelions. Check out our Dandelion Recipes blog-post, and you too can enjoy zero-effort "yardening". You'll learn how to forage and eat dandelions (and why you should)!

Get the Dandelion Recipes and tutorial on CanningCrafts.com.

Fresh picked dandelions

Cooked dandelion rolled in balls

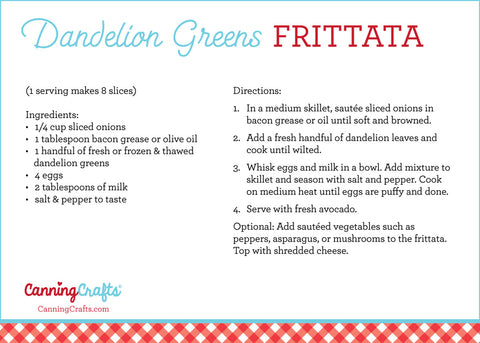
Dandelion Greens Egg Frittata

Dandelion Greens Egg Frittata with avocado

Need canning recipes? We got 'em! Go to our website CanningCrafts.com for jam, jelly, chutney, & veggie recipes, oh my!

Canning Recipes

If you can't beat 'em, Eat 'em dandelions

Wednesday, May 15, 2019

FREE Printable Vegetable Garden Markers

It's time to upgrade your garden markers game! Try your hand at making these DIY Garden Marker Printables. We designed over 30 colorful DIY Garden Markers tags. Download the free printables on our website. The vegetable garden markers are easy to make and utilize old canning lids and coat hangers. Print garden marker tags for specific veggies or print some blank labels to handwrite your own text.

Free Printable Garden Markers

Veggies included: corn, eggplant, watermelon, pumpkin, zucchini, green beans, cucumber, peas, carrots, beets, radish, potato, spinach, swiss chard, broccoli, cauliflower, peppers, and tomatoes. 

Free Printable Garden Markers

Free Printable Garden Markers

Download the free printables on our website CanningCrafts.com


Free Printable Garden Markers

Sign up for our newsletter to get more free printables, gardening tips, recipes, product updates, & a 10% off coupon on your first order of canning labels in our shop. 

Friday, June 29, 2018

Banana Peel Compost Tea Garden Fertilizers

As anyone who has watched “Back the Future” a million+ times knows, banana peels make terrific fuelBut even better than adding them to the Mr. Fusion unit on your time traveling DeLorean, you can add them as fuel for your garden. That’s right, compost those slimy banana peels and make your little green friends happy!
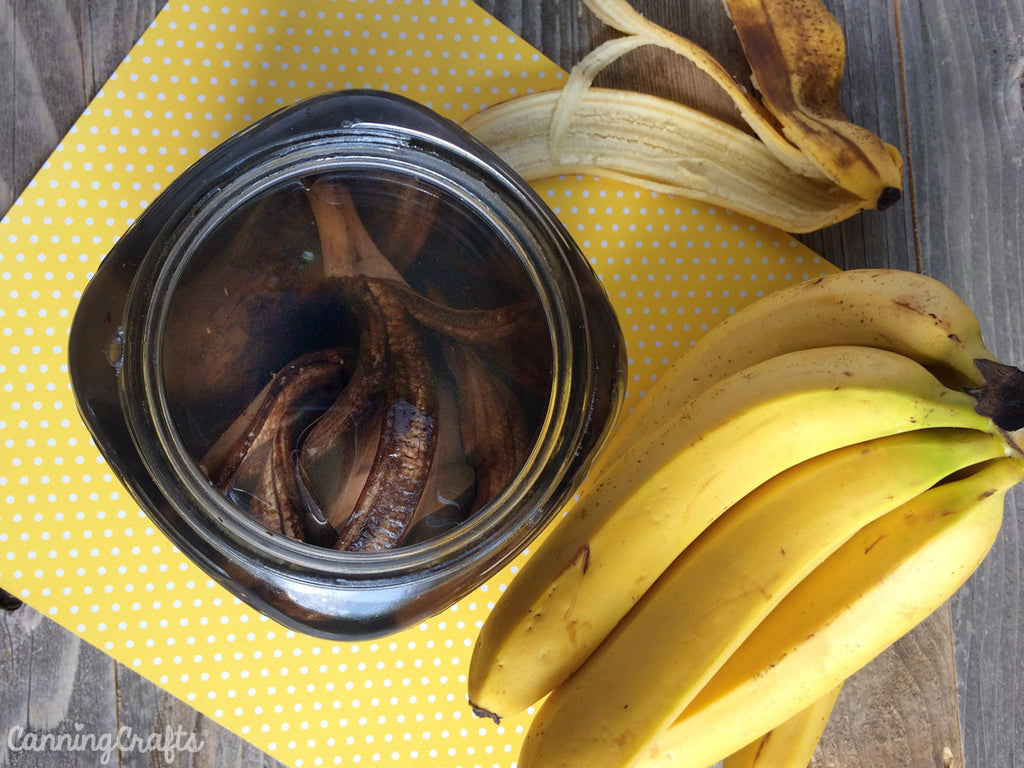
Banana Peel Compost Tea Garden Fertilizer | CanningCrafts.com

Banana Peel Nutrients

Bananas are a super food, and the peels are loaded with nutrients that your vegetation craves. First and foremost of these is, of course, potassium. Potassium greatly helps your plant’s overall strength. It makes the cell walls more robust on the fruit. I also helps generate stronger plant stems and promotes healthy root development.
Phosphorus has the next highest mineral concentration in banana peels. That’s great, because your garden loves phosphorus! Phosphorus is vital for vigorous plants. It aids germination, healthy roots, and strengthening production of blooms, pollen, and fruits. 
Not to be forgotten, peels also contain calcium and magnesium. These are important in your garden’s healthy development. Banana peels do NOT contain nitrogen. But the calcium helps make nutrients in the soil, such as nitrogen, more available to plants.
Banana Peel Compost Tea Garden Fertilizer | CanningCrafts.com

Our Vintage canning label is a great match for banana compost tea! 


How to Make Banana Peel Fertilizers

How do you transport all those amazing nutrients from your kitchen to your garden? While you could individually chuck banana peels on your garden, there are more efficient methods. Try making a compost tea or a dry fertilizer.
Banana peel compost tea is simple to produce. Keep a pitcher of water in your fridge filled about 3/4 full. Whenever you eat a banana, deposit the peel into the pitcher. Keep up this process until the container is full (or after about a week). Then strain the liquid into a new container. Put the peels aside, you can still use them! Clean the pitcher out and start the exercise all over again. The tea is nutrient-rich because the liquid has been slowly leeching Potassium, Phosphorus and nutrients out of the peels. In this form it is too concentrated, so you need to dilute it before putting it on your garden. One cup of tea per gallon of water should do the trick. Apply to the base of your garden plants and watch them thrive.
Okay, so you’ve made your pungent tea and now you have a bunch of slimy-gross banana peels leftover. That’s great! Take those peels and make more food for your plants! The easiest way would be to toss the peels into your compost bin. But if you want a quick fertilizer, put the peels into your blender with some water to make a puree fertilizer. Or you can try the powdered banana peel route so you can use them later. Use a food dehydrator to dry the peels (usually about 8-10 hours at 160ºF). Or place them on a parchment paper lined cookie sheet and bake them in the oven (extra low temperature) for about 8-10 hours. You can also let them bake in the sun. Once they are dry, chop them as fine as possible in a food processor or coffee grinder. Then you can add some PBP (powdered banana peel) to your new seeds or seedlings when you are planting.
Banana Peel Compost Tea Garden Fertilizer | CanningCrafts.com

How to Use Banana Peel Fertilizers

Add one cup of banana tea per gallon of water. Apply to the base of your garden plants and watch them thrive. Add some dried banana peel (powdered or cut pieces) to your new seeds or seedlings when you are planting. Some gardeners also use fresh banana peels in their garden. Burying them deeper around plants will help keep animals and pests away. The peels break down quickly, so plants are able to use the nutrients sooner. Just make sure the soil is moist so the peels can break down.
Banana peels are not a complete fertilizer! So don’t use them alone, especially if your plants need a lot of nitrogen. They work great for potassium-loving plants like tomatoes and peppers. To get the most out of peels, compost them with nitrogen-rich materials. 


Use Banana Peels as an Aphid Pest Repellant

Banana peels are also helpful for deterring aphids on plants. Aphids hate the smell of banana apparently. While adding peels around plants should help deter aphids, spraying a plant with the tea should help protect it more. Dilute the banana tea with water at a 5:1 ratio (5 parts water with 1 part tea). Spray the leaves and stems with the solution. The spray will also help feed your plants.  
Banana Peel Compost Tea Garden Fertilizer | CanningCrafts.com 

How I'll Use Banana Peels in MY Garden

I plan to use the banana peel fertilizers for my tomatoes and garlic. The peel fertilizers will be great for tomato plants since they don’t need much nitrogen. Potassium is a must for increasing the size of garlic bulbs. During the growing season, garlic also needs lots of Nitrogen which isn't in banana peels. However, Nitrogen supplementation needs to stop in the late spring or early summer before the scapes appear. Otherwise, there will be leaf growth at the expense of the bulb. So since there isn’t Nitrogen in the peels, it should be good to use after the scapes appear. This is my first year growing garlic, so I hope to have big bulbs with the help of these peels.
Banana Peel Compost Tea Garden Fertilizer | CanningCrafts.com

Do you use banana peels in your garden? If so, have you tried them fresh, composted, or as a tea fertilizer? What results have you seen?

Monday, April 16, 2018

Homemade Potting Soil Recipe for Planting Carrots in Containers

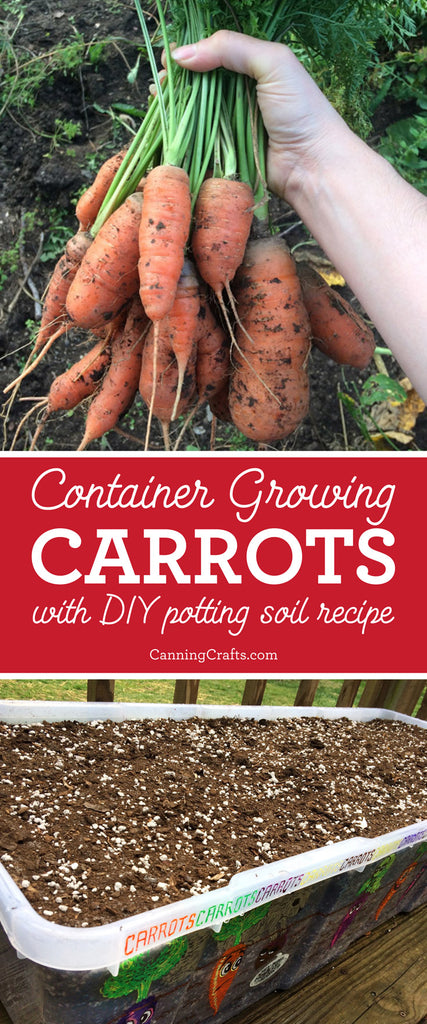
As some of you may or may not know, my garden spot is rather small. Minuscule, even. I cram an awful lot in there and push the ol’ boy to his limits. That’s right, my garden is a “he.” Ships are girls and gardens are boys. Look it up. It’s science. So this year, since space is at a premium, I decided to give container gardening a go. Also, I wanted to try out an array of new carrot varieties.
 
carrots | CanningCrafts.com
 
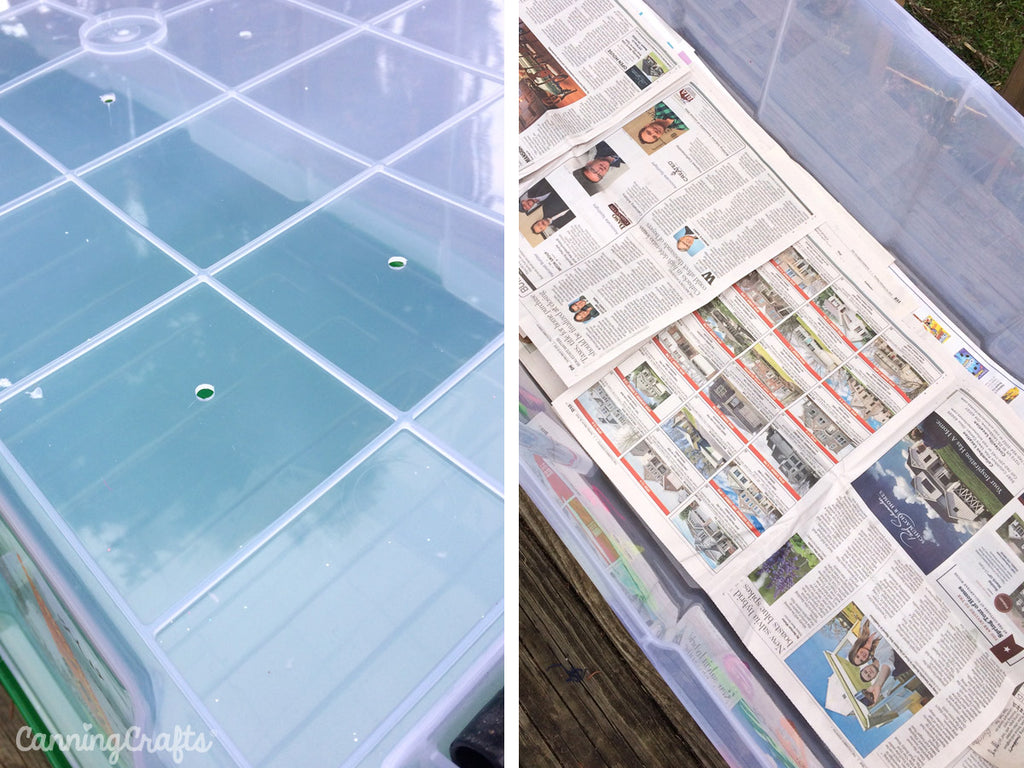
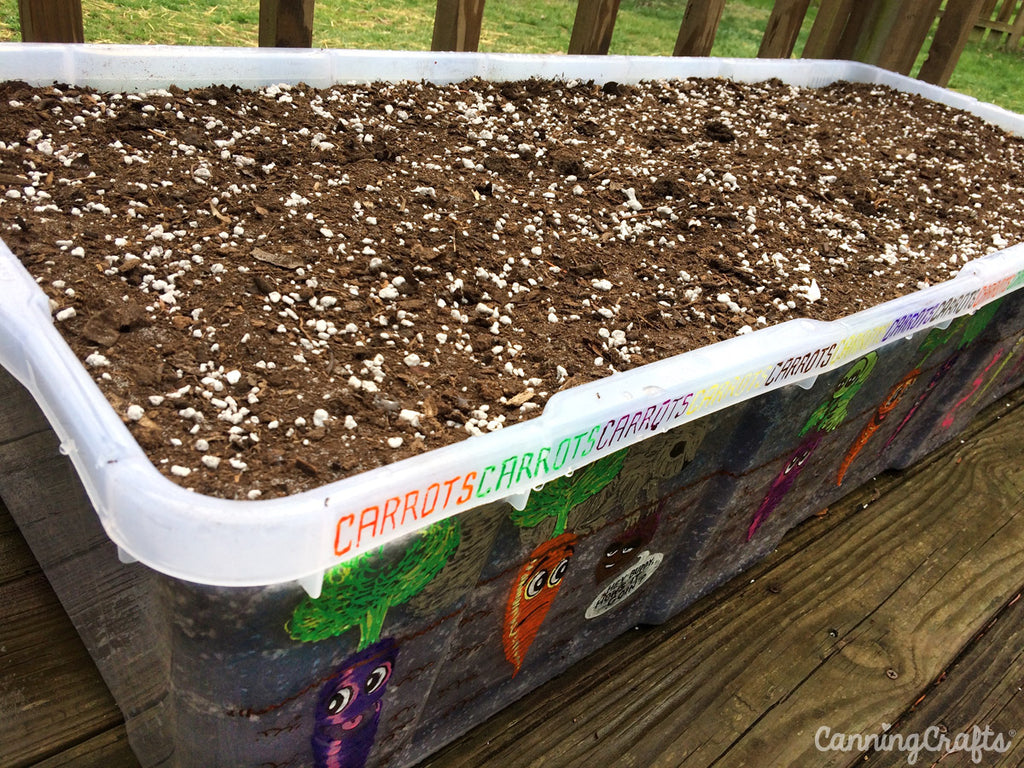
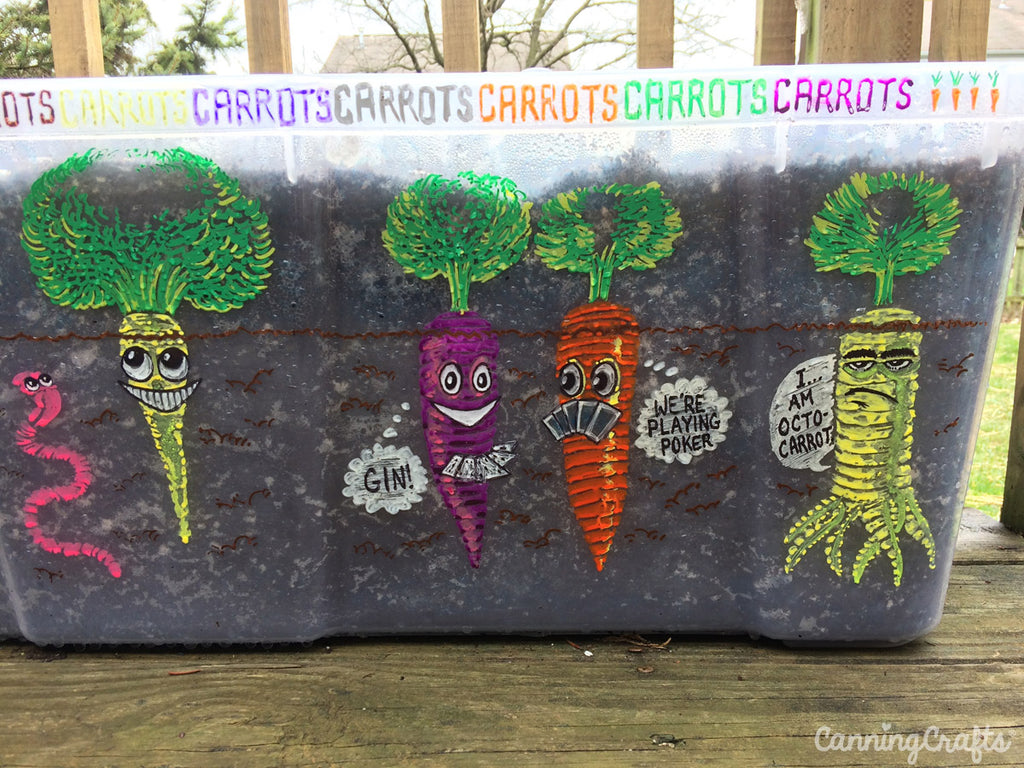
The first step is to find a receptacle for your garden to grow in. For carrots, you really only need it to be about one to one-and-a-half feet deep. I found a Christmas tree storage container that is going to be perfect for growing carrots. My husband even decorated it with some fun carrot doodles (more on that later). It is large enough to accommodate the quantity I plan on growing, but is still small enough to be mobile, if necessary. I drilled more than a dozen 1/4” holes on the bottom for proper drainage. I then placed newspaper inside on the bottom of the container before filling with soil. This will make sure that it doesn’t create a muddy mess all over my porch. 
growing carrots in a container | CanningCrafts.com
 
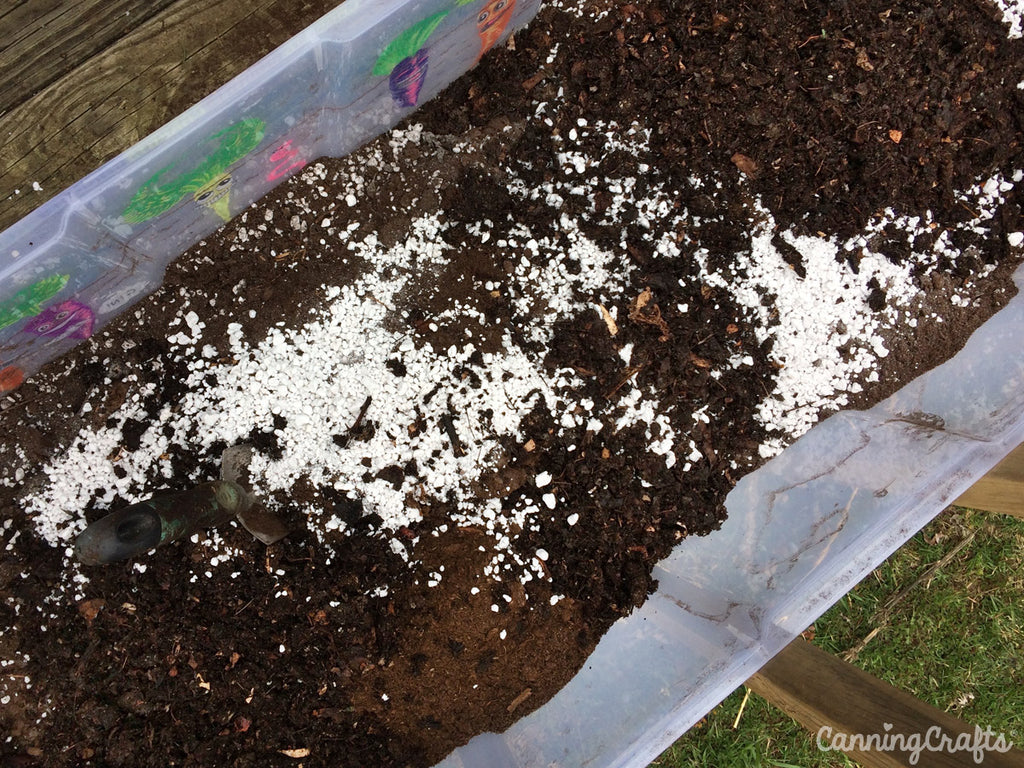
You need a loose and light soil mix for carrots to flourish. A soil that isn’t compacted will allow your carrots to grow longer. I am using a near equal combination of sphagnum peat moss, perlite, and compost. There are other alternatives you can try as well, which I'll list later. Why make your own soil instead of buying a convenient bagged mix? The cost is much less to make your own. PLUS, there's the added benefit of knowing exactly what's in it. So you can tailor your mix for specific foods that you grow.
Homemade potting soil mix recipe | CanningCrafts.com
 

Sphagnum Peat Moss

Peat moss is sought after because of its ability to retain several times its weight in moisture. It releases moisture to plant roots as needed. Peat moss is widely available to buy and is inexpensive. Coco coir (the fibrous material around the shell of a coconut) is also a very good option in place of peat moss.
 

Perlite or Vermiculite

Perlite is a volcanic glass/ash that's used to aerate the soil and keep it well draining. It can hold 3-4 times it's weight in water without becoming soggy. It's sterile and pH-neutral and doesn't break down easily. Vermiculite is a mineral that's expanded in a furnace, making it lightweight. It adds aeration to soil and retains nutrients. It must, howeverbe handled gently. If handled roughly, it will compact and lose the ability to hold air. Vermiculite holds water, contains calcium and magnesium, and is almost pH-neutral. I opted to go with perlite for my container instead of vermiculite due to cost. Perlite is much less expensive.
 

Compost, aka "Black Gold"

Compost adds lots of nutrients to the mix. In fact, it's one of the best fertilizers around. Compost is a good source of nitrogen, phosphorous, and potassium. The nutrients in compost are slowly released. The micronutrients in compost are essential for plant growth. Compost retains moisture, and improves the chemical, physical, and biological quality of soil. Overall, compost creates a better environment for plant roots. My compost needed sifted since it was a little chunky in it’s current state. There were avocado pits and bits that hadn't broken down yet. It needed to be much finer in texture to accommodate carrots. After all, I was after long carrots. So I wanted to avoid any obstacles in the soil that may impeded their growth.
 
homemade potting soil mix recipe | CanningCrafts.com

Alternative & Eco-Friendly Soil Mixes

Peat moss, perlite, and vermiculite contribute to pollution when mined, processed, and packaged. There are several alternative and more eco-friendly potting soil ingredients you can try. Peat moss comes from wetland bogs which help sequester carbon. It grows slow, so increased demand may encourage over harvesting. So conservation of peat bogs is as important as protecting the rainforests. Composted tree bark, wood chips, and rotted leaves are good substitutes. And since we're surrounded by trees, most of those ingredients are free!
 
Alfalfa may be another good option to replace peat moss. It's rich in nitrogen which is slowly released into soil.
 
Coarse sand (bulider's sand) can replace perlite, a mined ore, to lighten soil and improve drainage. A little sand goes a long way. Adding too much will make the soil heavy. Avoid fine sands which end up making soil dense and heavy too.
 
Vermiculite naturally contains a small amount of asbestos. Inhaling asbestos fibers is dangerous as they are carcinogenic. You should wear a mask and only use vermiculite in ventilated areas. Wetting it helps the dust from spreading. Pine fines, finely ground pine bark, are a good alternative to vermiculite. Coco coir, ground coconut husk, is also a good replacement. Depending on your location, it may be an exotic ingredient as it comes from India or Central America. Coco coir can hold up to nine times its weight in water and also help aerate the soil. 
 
Many gardeners use their best garden soil amended with compost or composted manure. Clean, commercial top soil would be okay to use as long as it's untreated. I toss old potting soil from houseplants into my compost too. Soil doesn't go BAD, it just becomes lacking in nutrients. So organic matter needs added back into soil over time.
 
Newspaper is often used in the garden as a natural mulch and weed suppressant. Some gardeners even make potting cups from folded newspapers. Ground up newspaper helps retain moisture and adds organic matter to soil. There has been debate amongst organic gardeners on the safety of using newspaper in soilMost newspapers use soy inks and bleach paper using hydrogen peroxide instead of chlorine bleach.
 

Alternative Fertilizers

If your soil mix is lacking in compost, you may consider an organic fertilizer. The fertilizer choice would depend on the base growing mix. And since many fertilizers effect the pH, choose appropriately! Blood meal adds nitrogen and bone meal adds phosphorus. Kelp meal, greensand, or other minerals add minor nutrients. I often hear great things about bat guano, although I've never used it. I have used wood ash in my garden before because my mom claims it's the best. Mom is NEVER wrong. Composted manure is often a fan favorite for gardeners. The pièce de résistance (in my particular case, at least), is my manure fertilizer. That’s because it is “Grade A, 100% Marion Township, Grey Donkey Dung” (a direct quote from my father-in-law). This manure is as near a perfect example of nature’s fertilizer that you are likely to find on God’s green earth. Add organic fertilizers in small amounts or if your plants aren't growing how you want them to. 
 
Donkey manure fertilizer | CanningCrafts.com
This is Norman and Lady. Their poop is in my garden. And the world's greatest father-in-law drove that poop four hours round trip to my house. And Norman thinks that's hilarious...


Planting Carrots 

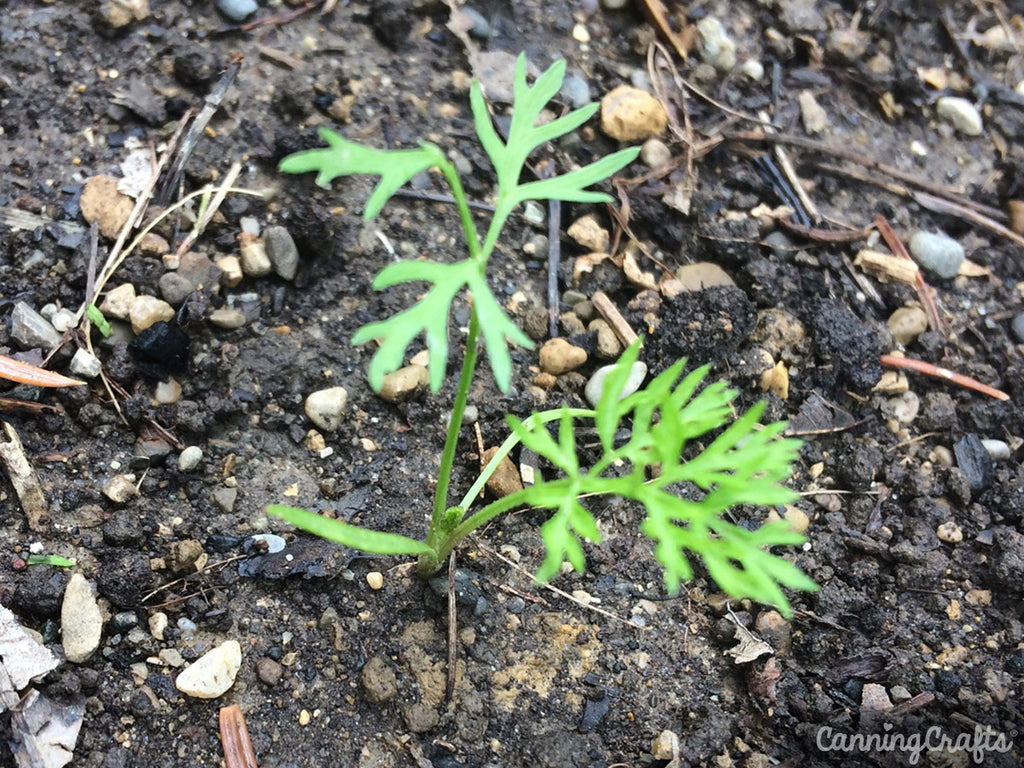
Planting carrot seeds is as easy as sprinkling the seeds along the surface. They shouldn’t be that far apart from one another, and can even be planted in clusters of three, if you prefer. The seeds should not be planted deep at all, so spread a rather thin layer of your soil mixture overtop. Carrots need a very moist soil to germinate in. This can prove problematic since the top layer of soil will dry out quickly due to evaporation. Some find it easier to pre-water the ground before dropping the seeds. Then watering again after the covering the seeds with soil. Remember to keep an eye on your carrots in these early days, so the ground never goes too dry or becomes a swamp.
 

Thinning Carrots

Once the seeds germinate and have spouted to a couple inches high, you will need to thin them out. Each remaining carrot should be about an inch apart. The thinning process is very important! Overcrowded carrots won't get the nutrients, moisture, and space needed to thrive. You may need to mound up soil around your carrots that remain, so the roots aren’t exposed.
 
If you want your carrots to do really well, you may want to thin them a second time after another month. This time try to get them an inch and a half to two inches apart. These little carrots should be substantial enough for you to eat. If careful, you can try transplanting thinned carrots to areas with low germination. Try to get them into the ground as upright as possible—I know, that’s tricky! Remember to cover over the roots so they avoid exposure to sunlight. Once the carrots are about three inches tall, I'll add more compost fertilizer around them.
 
Thinning Carrots | CanningCrafts.com

Crazy Carrot Container

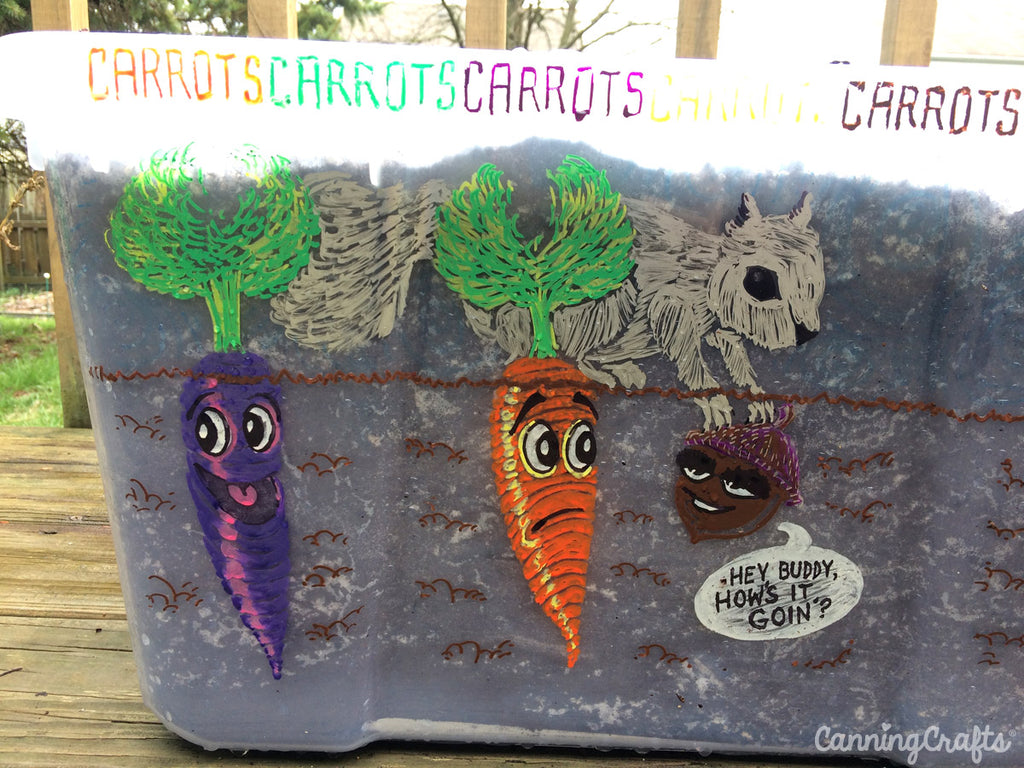
Oh yes, before I wrap this up I should mention my husband’s vandalization of the carrot container. I asked for something classy and stylish… and instead I got this! Just kidding! I think this is super cute and love that the soil comes through behind the cartoons. He used acrylic paint markers that will hopefully hold up to the elements. We shall see. 
 
Carrot Garden Container | CanningCrafts.com
YES. There will inevitably be a squirrel digging in my container. 
 
Carrot Garden Container | CanningCrafts.com
And swallowtail caterpillars are big fans of carrot tops.
 
Carrot Garden Container | CanningCrafts.com
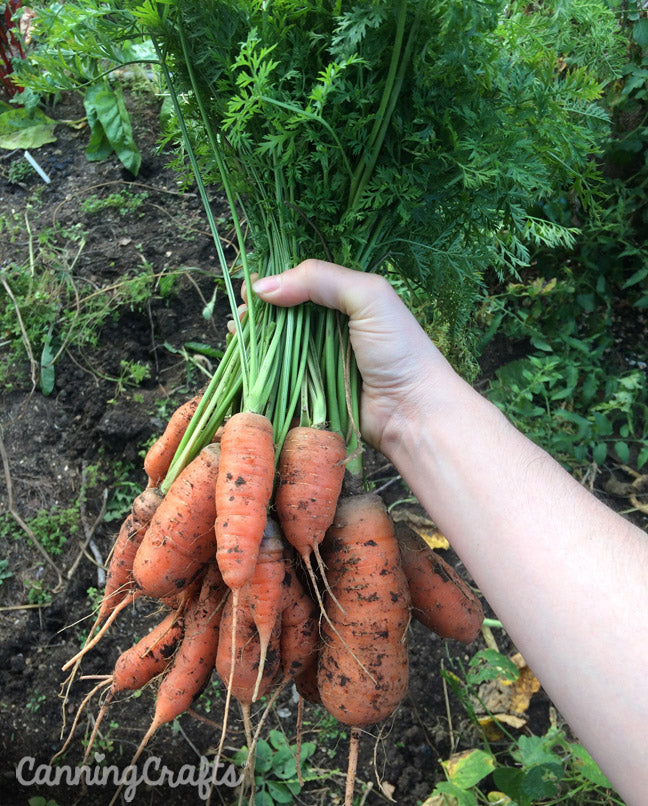
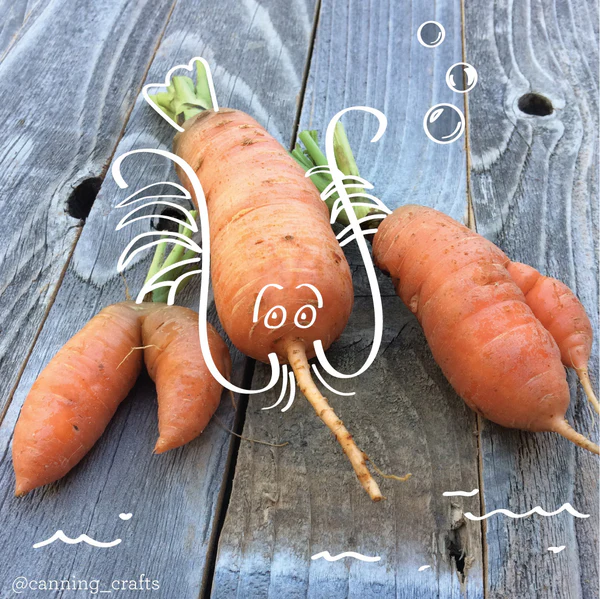
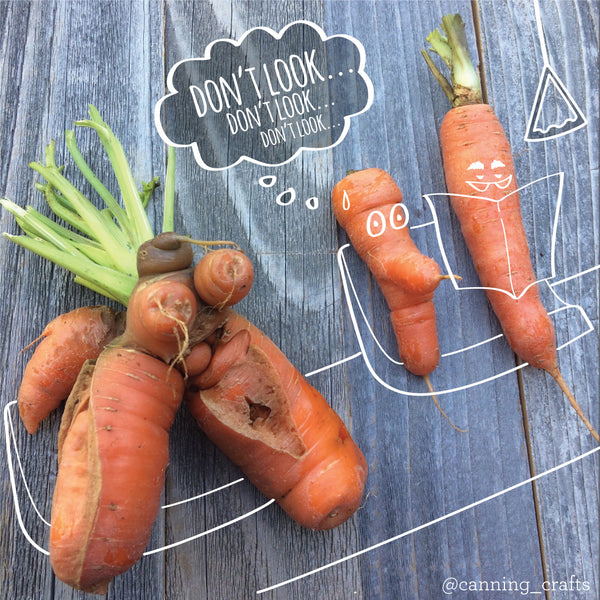
Sometimes I get funky carrots with multiple limbs. I'm hopeful that planting in a container this year will eliminate crazy carrots! 

Carrot Deformities & Growing Issues

A proper soil mix free of rocks and debris will ensure long straight carrots. But there are other carrot growing issues that may come up. Splitting happens if there's inadequate moisture or fluctuations in moisture. Carrots need just the right amount of water, about an inch a week during the growing season. The soil should be moist but not waterlogged. Roots will rot if there's too much moisture. If you neglect to water carrots, compensating by overwatering will lead to cracks. Moisture stress causes stunted growth as well. Too much nitrogen can also cause cracking and multiple roots to form.

Overcrowding can cause deformities such as forking and splitting in carrots. Plant and thin according to the seed packet guidelines. Use a loose soil and remove weeds to allow carrots to grow straight. Mulching around carrots will help suppress weeds.
 
Deformed and cracked carrots are usually still safe to eat. You can cut off damaged portions if they don't look right. I often add deformed carrots to my chicken bone broth.
 
Of course if you don't want to eat your deformed carrots, you can always PLAY with them!
 Twisted Carrot Theater | CanningCrafts.com

 Twisted Carrot Theater | CanningCrafts.com
Aster yellows disease also causes deformities including secondary roots. This disease is caused by a mycoplasma organism carried to plants by the aster or six-spotted leafhopper. While the disease affects many other plants, carrots are often the most affected. The first symptom is yellowing leaves, then plants are stunted. Taproots become very hairy, pale in color, and bitter tasting. Affected carrots are may be inedible because of the taste.

Additional Reading

ATTRA Sustainable Agriculture has a handy PDF download on organic potting soil mixes. They have tips on making your own potting soil mix with additional info on fertilizers.
Planting Carrots in Containers with Homemade Potting Soil Recipe | CanningCrafts.com

Do you plant your carrots in raised beds or containers? Do you have any growing tips or favorite soil mixes?

Friday, October 6, 2017

How to Save Tomato Seeds from Your Garden

We grow tomatoes every year. This is in large part because my husband has an unhealthy addiction to homemade salsa. Some years our tomatoes are gangbusters and some years they’re a bust. This year we lucked out with our super-tasty Sungold Cherry tomatoes. I most definitely want more of these suckers in the future. So here's a refresher on the art of saving tomato seeds.

How to Save Tomato Seeds | CanningCrafts.com
First you need to find fruits that do not have diseases or harmful micro-organisms. This means that they need to be free of splits or insect holes. Choose the most perfect examples you have so that next year’s plants will work with the best genes possible. Also don’t forget to wash off your fruit before cutting them open.

How to Save Tomato Seeds | CanningCrafts.com

When it comes to saving seeds from your favorite and most tasty tomatoes, there are 3 routes you can take: 

1. Basic Drying

This is (almost) the easiest method. Slice the tomato open and squeeze or cut out the largest seeds onto a plate. Then arrange the seeds in clusters of 3 or 4 onto a paper towel or coffee filter. Let them dry naturally for a week or two until there is no moisture. Store as-is or cut the towel apart into individualized little seed starters. You can store these in an envelope until next spring. Using the basic drying method, seeds keep for one or two years. Use the fermenting method (step 2 below) if you want to store them longer.
How to Save Tomato Seeds | CanningCrafts.com

2. Fermenting

The fermentation process allows tomato seeds to store for up to 6 years and still be viable. This is because you're removing the gelatinous sac that encompasses each tomato seed. The gel is what stops germination from transpiring until the seed is planted in the ground. But, the gel can also contain diseases that may damage the growth of the plant. So removing the residue is essential to long-term seed storage.

How to Save Tomato Seeds | CanningCrafts.com
To remove the gel, slice your fruit in half and squeeze or scoop the seeds into a bowl or jar. If the seeds are not floating in enough tomato liquid, add some water to help separate the seeds from the pulp. Cover the jar with cloth and let the mix sit uncovered in a warm, out of the way place for 24 to 48 hours. Fair warning, this will start to smell funky which is normal. If you are saving several varieties at once, don't forget to label each jar so you can identify the seeds later. The seeds are ready when they are sitting on the bottom (if using a glass jar, you will be able to see them). Skim off the pulp and whatever funk has developed on the top of the jar. Then strain the seeds at the bottom and rinse them with water. Any remaining gel should come off in the rinsing process. Allow the seeds to dry using the paper towel method from the “Basic Drying” section above.

How to Save Tomato Seeds | CanningCrafts.com

NOTE: Older seed saving methods suggest fermenting seeds for up to 4 days or longer. A newer study indicates that it's best to soak seeds for only 1-2 days. Fermenting longer than 3 days decreases the seed germination rate. You do not need to have a layer of mold on the seeds either. 

3. Forced Volunteer

Now this method IS the easiest. All you have to do is select the spot in your garden where you want your tomatoes to be next year. Bury cut tomatoes or the gel/seed mixture 2 or 3 inches deep, then place a layer of mulch over that. Wait until springtime to remove the mulch, gently stir up the soil, water and wait. You could also let your tomatoes naturally drop in the garden and seed themselves wherever they darn well please. If you grow tomatoes, you already know how easily volunteer plants spring up. The benefit to doing forced volunteer plantings is that you know what variety is growing where. But there's something very fun about having "Mystery Plants" too! With any luck, you’ll have another round of your favorite and most tasty tomatoes next season! 

We designed these FREE Printable Seed Saver Packets just for you! Our free seed saver packs are great for saving seeds from your garden. Store seeds for yourself or use them for gift-giving seeds to your friends. Just print, cut, fold, and glue the seed packets to store your vegetable, fruit, or flower seeds. We hope you enjoy using these free packets. And PLEASE, share these with your fellow gardeners and seed savers.
free printable vegetable seed packet from CanningCrafts.com

Have you saved tomato seeds from your garden before? If so, which method did you use to save the seed? Let us know in the comments below.