Showing posts with label tomato. Show all posts

Tuesday, June 6, 2023

Trench planting tomatoes for Epic Root Growth & Strong Plants

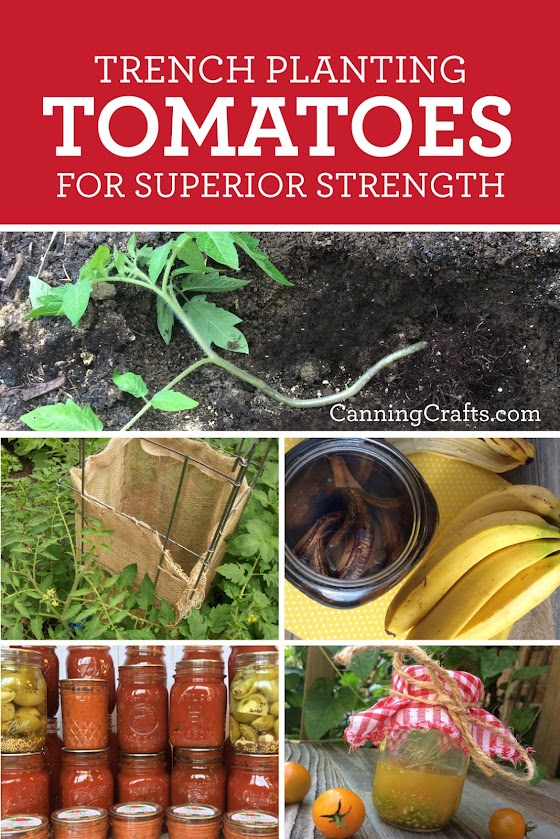
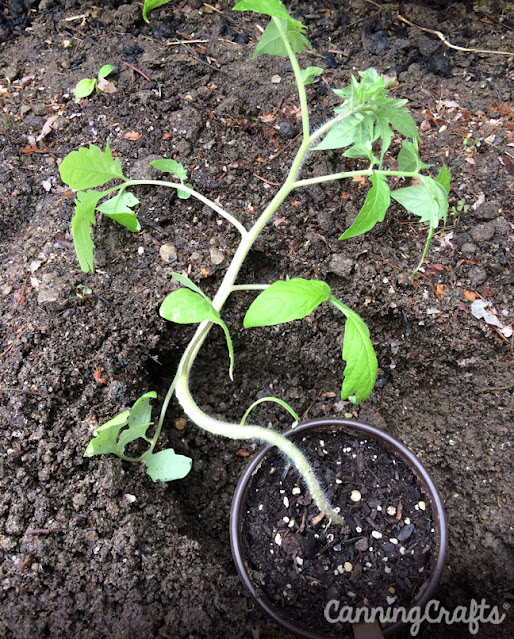
Oh, what to do with with the too tall & spindly tomato plants that you've put off getting into the ground? Are they a lost cause? Need to head back to the garden-center and get some fresh "perfect" ones? Au contraire. Check out our Trench Planting Tomatoes blog-post, and find out how you can not just salvage your maladroit seedlings but make them truly flourish.

Get the Trench Planting Tomatoes guide and tutorial on CanningCrafts.com.

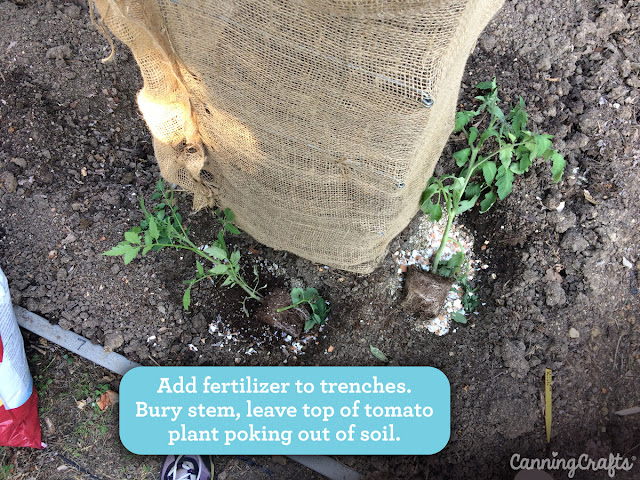
Trench Planting Tomatoes

Trench Planting Tomatoes

Trench Planting Tomatoes

Trench Planting Tomatoes

Need canning recipes? We got 'em! Go to our website CanningCrafts.com for jam, jelly, chutney, & veggie recipes, oh my!

Wednesday, April 26, 2023

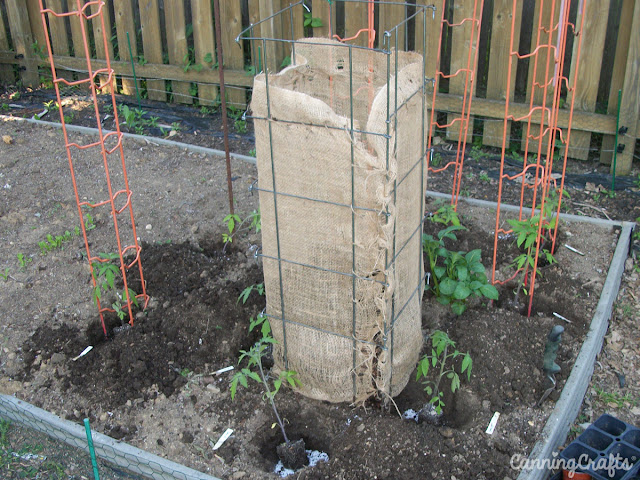
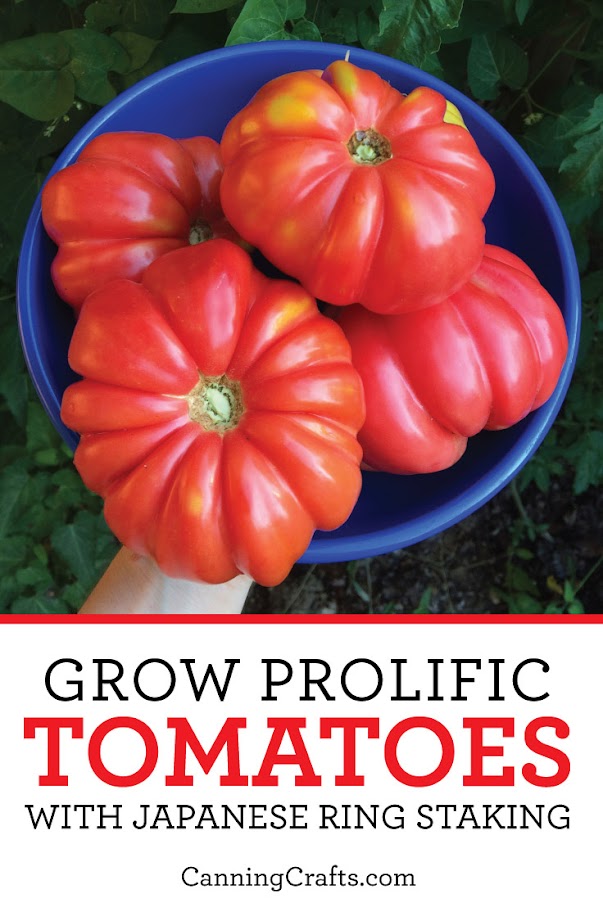
So, funny story, Japanese tomato rings most likely didn't originate in Japan. About 60 years ago a postal worker from Charleston, South Carolina named Callahan was being interviewed about his tomato growing practices by a reporter named Eddie Jones. As they were talking about the ring method he used for growing plentiful tomatoes, Callahan also spoke about his tours in the Air Force and time he had spent in Japan. Eddie inferred that the rings came from Japanese gardening, but they never did. Eddie's story ran in the paper and was quite popular, so popular in fact, that it ran year after year during gardening season and eventually was picked up by newspapers around the nation. And the rest is history, as they say. Check out our Japanese Tomato Rings blog-post, and you too can perfect the time-honored "Charleston, South Carolina Tomato Rings" technique.

Get the Japanese Tomato Rings guide and tutorial on CanningCrafts.com.

Japanese Tomato Rings staking method

Japanese Tomato Rings staking method

Japanese Tomato Rings staking method

Japanese Tomato Rings staking method

Need canning recipes? We got 'em! Go to our website CanningCrafts.com for jam, jelly, chutney, & veggie recipes, oh my!

Friday, October 6, 2017

How to Save Tomato Seeds from Your Garden

We grow tomatoes every year. This is in large part because my husband has an unhealthy addiction to homemade salsa. Some years our tomatoes are gangbusters and some years they’re a bust. This year we lucked out with our super-tasty Sungold Cherry tomatoes. I most definitely want more of these suckers in the future. So here's a refresher on the art of saving tomato seeds.

How to Save Tomato Seeds | CanningCrafts.com
First you need to find fruits that do not have diseases or harmful micro-organisms. This means that they need to be free of splits or insect holes. Choose the most perfect examples you have so that next year’s plants will work with the best genes possible. Also don’t forget to wash off your fruit before cutting them open.

How to Save Tomato Seeds | CanningCrafts.com

When it comes to saving seeds from your favorite and most tasty tomatoes, there are 3 routes you can take: 

1. Basic Drying

This is (almost) the easiest method. Slice the tomato open and squeeze or cut out the largest seeds onto a plate. Then arrange the seeds in clusters of 3 or 4 onto a paper towel or coffee filter. Let them dry naturally for a week or two until there is no moisture. Store as-is or cut the towel apart into individualized little seed starters. You can store these in an envelope until next spring. Using the basic drying method, seeds keep for one or two years. Use the fermenting method (step 2 below) if you want to store them longer.
How to Save Tomato Seeds | CanningCrafts.com

2. Fermenting

The fermentation process allows tomato seeds to store for up to 6 years and still be viable. This is because you're removing the gelatinous sac that encompasses each tomato seed. The gel is what stops germination from transpiring until the seed is planted in the ground. But, the gel can also contain diseases that may damage the growth of the plant. So removing the residue is essential to long-term seed storage.

How to Save Tomato Seeds | CanningCrafts.com
To remove the gel, slice your fruit in half and squeeze or scoop the seeds into a bowl or jar. If the seeds are not floating in enough tomato liquid, add some water to help separate the seeds from the pulp. Cover the jar with cloth and let the mix sit uncovered in a warm, out of the way place for 24 to 48 hours. Fair warning, this will start to smell funky which is normal. If you are saving several varieties at once, don't forget to label each jar so you can identify the seeds later. The seeds are ready when they are sitting on the bottom (if using a glass jar, you will be able to see them). Skim off the pulp and whatever funk has developed on the top of the jar. Then strain the seeds at the bottom and rinse them with water. Any remaining gel should come off in the rinsing process. Allow the seeds to dry using the paper towel method from the “Basic Drying” section above.

How to Save Tomato Seeds | CanningCrafts.com

NOTE: Older seed saving methods suggest fermenting seeds for up to 4 days or longer. A newer study indicates that it's best to soak seeds for only 1-2 days. Fermenting longer than 3 days decreases the seed germination rate. You do not need to have a layer of mold on the seeds either. 

3. Forced Volunteer

Now this method IS the easiest. All you have to do is select the spot in your garden where you want your tomatoes to be next year. Bury cut tomatoes or the gel/seed mixture 2 or 3 inches deep, then place a layer of mulch over that. Wait until springtime to remove the mulch, gently stir up the soil, water and wait. You could also let your tomatoes naturally drop in the garden and seed themselves wherever they darn well please. If you grow tomatoes, you already know how easily volunteer plants spring up. The benefit to doing forced volunteer plantings is that you know what variety is growing where. But there's something very fun about having "Mystery Plants" too! With any luck, you’ll have another round of your favorite and most tasty tomatoes next season! 

We designed these FREE Printable Seed Saver Packets just for you! Our free seed saver packs are great for saving seeds from your garden. Store seeds for yourself or use them for gift-giving seeds to your friends. Just print, cut, fold, and glue the seed packets to store your vegetable, fruit, or flower seeds. We hope you enjoy using these free packets. And PLEASE, share these with your fellow gardeners and seed savers.
free printable vegetable seed packet from CanningCrafts.com

Have you saved tomato seeds from your garden before? If so, which method did you use to save the seed? Let us know in the comments below.

Friday, August 5, 2016

Garden 2016

My garden is a big green mess this year. Nothing new there! Below are a few photos of my crops. Head on over to my new website to see all of my photos. Also of note, I just started posting to Instagram. I'll do my best to post garden photos periodically.

Tuna Fish Joe with heirloom tomatoes

heirloom tomatoes

garden

heirloom tomatoes

dill weed

Friday, August 14, 2015

Garden 2015: WooHoo! Tomatoes & Spinach

This has definitely been the worst garden I've ever had. My green beans were torn apart by rodents, and I only harvested about 1.5 gallon bags of beans compared to probably 10 gallons in past years. We set traps out and caught 3 RATS! I never thought I'd have rats in the garden. I'm guessing they must've gotten relocated during our 2 week rain spell when the storm sewers were overflowing. The traps haven't been set off in nearly a week, so I'm hopeful they're all gone.

Something, probably a raccoon, started to eat my tomatoes. I was hesitant to hook up my electric fence because I didn't want my new dog to get zapped. I know it's a small static electricity shock, but still, I didn't want to freak him out. BUT once I had 4 of my Black Krim tomatoes gnawed on, I decided to give my electric fence another go and hope for the best.

I had poor results with the electric fence in the past. In all fairness, the problem could be that the location of my garden is next to trees and fences where critters can just hop on down into it. One thing I know that the fence works on is poor little doggies. Tuna Fish Joe got shocked twice and freaked out, so I decided to switch it off again because he seemed afraid to even go out into the back yard.

The good news is that I'm at least getting a few tomatoes. Some of the plants are browning, so I don't know that I'll get many more. The Black Krim tomatoes that I've picked are perfect and beautiful. I've always had good success with this variety and also the Amish Paste.

Black Krim Tomato 
Black Krim Tomato looks interesting when sliced.

Black Krim and Amish Paste Tomatoes 

The ornamental spinach is called Malabar Spinach. I believe it's supposed to flower at some point. Since the leaves get thicker, it's best to eat them raw when they're small and young. I've been tearing up the larger leaves and sautéing them in bacon grease and frying them with eggs most mornings. I'm kinda healthy like that.

Ornamental & edible climbing spinach. 

Tuna Fish Joe was a fan of the green beans and carrots in my garden,
but not the electric fence!


Friday, July 10, 2015

Garden 2015: Yikes

Is my garden unruly because it's a jam packed raised bed or because I'm a lazy gardener? This year, my vote's on the latter. 

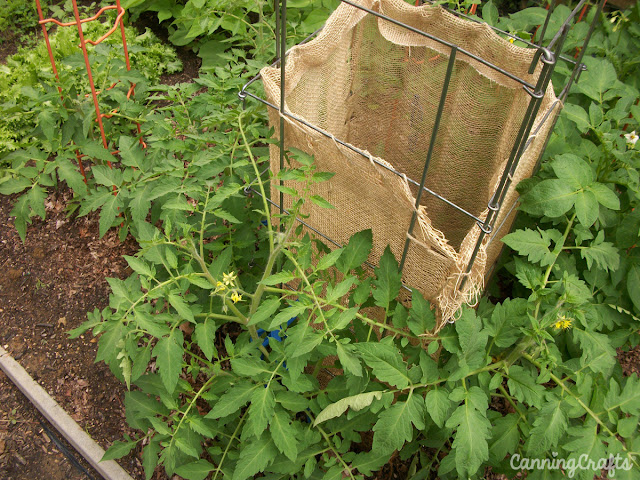
The tomatoes I planted using the Japanese ring method continue to make the rest of the tomatoes in my garden look like spindly little plants. The tomato in the tower to the left of the rings is maybe half the size of those around the ring. Unfortunately some of the other tomatoes behind the ring are dying, most likely because I had a volunteer potato take over. I should've pulled the potato early on considering that half of my garden this year is potatoes, but I find volunteer plants to be exciting even though they usually end up taking over everything like my volunteer pumpkins did last year.

You can barely see the cage the tomatoes are surrounding now.
They've grown above the cage and are bowing down into it now.
Potatoes, Swiss Chard, Kale (which has been picked by birds), Carrots, Endive, Tomatoes.
We ate a batch of greens yesterday with onions glazed in bacon grease. 
Black Krim Tomatoes.
Some green beans are ready to pick now. I don't have a pressure canner,
so I just freeze them or make a Pot 'O Beans in the pressure cooker.
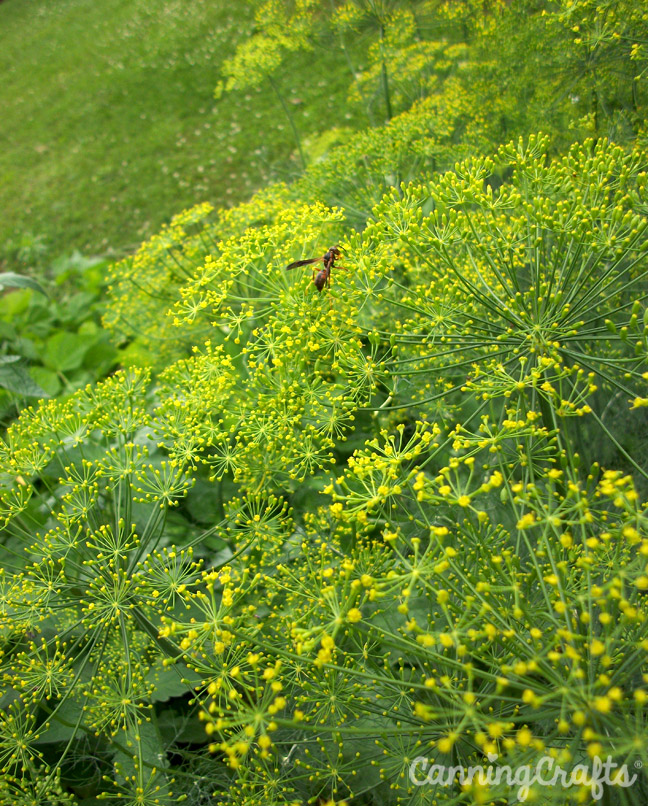
Hey, volunteer Dill, big surprise ;) 
Tuna Fish Joe LOVES raw green beans.

Friday, June 19, 2015

Garden 2015: What A fine Mess I Have

Hey, my garden is really starting to shape up. It's a little crowded in a few spots because I have the bad habit of not pulling up volunteer plants. But at least I don't have hundreds of pumpkins growing in it this year.

It's been raining for almost a week straight here in Ohio, so the beans have gone crazy. They might have doubled in size since last week. I'm looking forward to pressure cooking them with bacon (or a ham bone), onions, and potatoes. My family ate this meal a ton as I was growing up. We called it "Pot 'O Beans." That sounds like a pretty unglamorous name, and honestly, it doesn't look that fancy in a bowl either. But it tastes great even though it's pretty simple.

My grandpap used to shake about a tablespoon of black pepper into his bean bowl. But he would miss half of the bowl because he had a bum arm. When we were done eating and cleaned the dishes up, we were always amused by the black pepper ring left on the table around his bowl. It looked like an eclipse.


So far it looks like my trash can potatoes are doing well. The plants actually look better than the variety I planted in the ground next to it. I've been filling the can with dirt every 6" of plant growth, so the can is nearly filled to the top now. I'm eager to see if the can gets 100 pounds of taters. I was skeptical that it would, so that's why I planted potatoes in the ground too.


Most of my tomatoes are around 3' feet tall now. There's a noticeable difference between the plants around the Japanese Tomato Ring structure and those in the towers. The tower plants seem dwarfed in comparison. They aren't nearly as tall, the stems are not as thick, and they don't have blossoms yet. All were started indoors at the same time. One of the tower plants died a week or so after I planted it, which is odd for my garden.


I have a big potato plant growing right next to my tomatoes. I probably should've pulled it, but I figured   1) there's nothing wrong with MORE potatoes  2) last year's crop did really great, so if the spud I forgot in the ground decided to grow, well, I should just let it  3) we REALLY like potatoes.


This year my lettuce bed has onions, volunteer dill, and several tomato plants. I planted dill once...5 years ago. It keeps growing everywhere. I used to pull it up, but then I ended up using it in a batch of dill pickles I made. So I just let it grow...and grow...and grow. I also use it freely in tuna salad.


Endive always does good in my garden. My husband despises it with a passion.


Kale. Another arch nemesis of my husband. I was hoping to dehydrate some of this to use in a green supplement powder, but it doesn't look like I have much to work with just yet.


I'm not sure what this little guy will grow into. I'm not sure if he's eating the dill plant or not. I have about 100 dill plants growing everywhere, so eat away little fellow. Let's hope he doesn't turn into something that devours my garden.

Friday, June 5, 2015

Garden 2015: Japanese Tomato Rings

I just got my tomatoes planted in the garden. Usually I setup 4 plants around a Japanese Tomato Ring, then the rest are in towers. My ring is a little small (about 1.5') compared to what some gardeners build (4'-6').

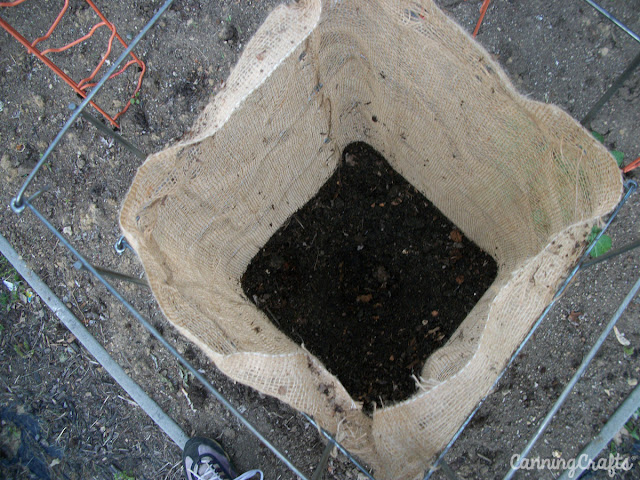
I use a foldable trellis to form my ring. Since the gaps are larger on it, I line the inside with burlap that gets tied on with twine to help keep the compost inside.


Then once folded and setup in the garden that already has the soil prepped, you simply add your compost. I've read that some folks just use compost with clippings & waste, then others also add 10-10-10 fertilizer and do lasagna layering. I've never added fertilizer to my rings since I had always assumed that the compost would be enough. Maybe the yield would be better if I added fertilizer too.

I've had success by adding a few feet of compost topped with soil. Then I dig a hole in the center of the soil which is where you water the plants (if it's really dry out, I'll also water plants directly). The compost will provide plenty of rich nutrients during the growing season and give you a bumper crop. The compost will also keep the soil more moist and hopefully prevent blossom end rot.


The tomatoes get planted on the outside of the ring, then mulched with leaves. I put 4 plants around the trellis, 1 on each side. I usually tie the plants as they grow up. In the past I would plant 4 different varieties around the ring, then have the same varieties in the rest of my garden in towers just to compare the yield with this growing method. I could definitely see a bigger bounty compared to just adding compost to the soil around my staked tomatoes.

This year I only have Black Krim and Amish Paste tomatoes growing in my garden. Originally I was going to make more salsa, but my sister supplied me with a bunch of hot house tomatoes a few months back that yielded 45 pints of my husband's favorite snack. So I'm hoping that batch will keep him another year and free up my tomatoes for sauce and a few jars of stewed tomatoes.